 BExchange
BExchange
BExchange quick guide
The site's main features, explained in two minutes with a few screenshots.
Best experienced on a computer — these desktop screenshots are easier to read on a larger screen.
1
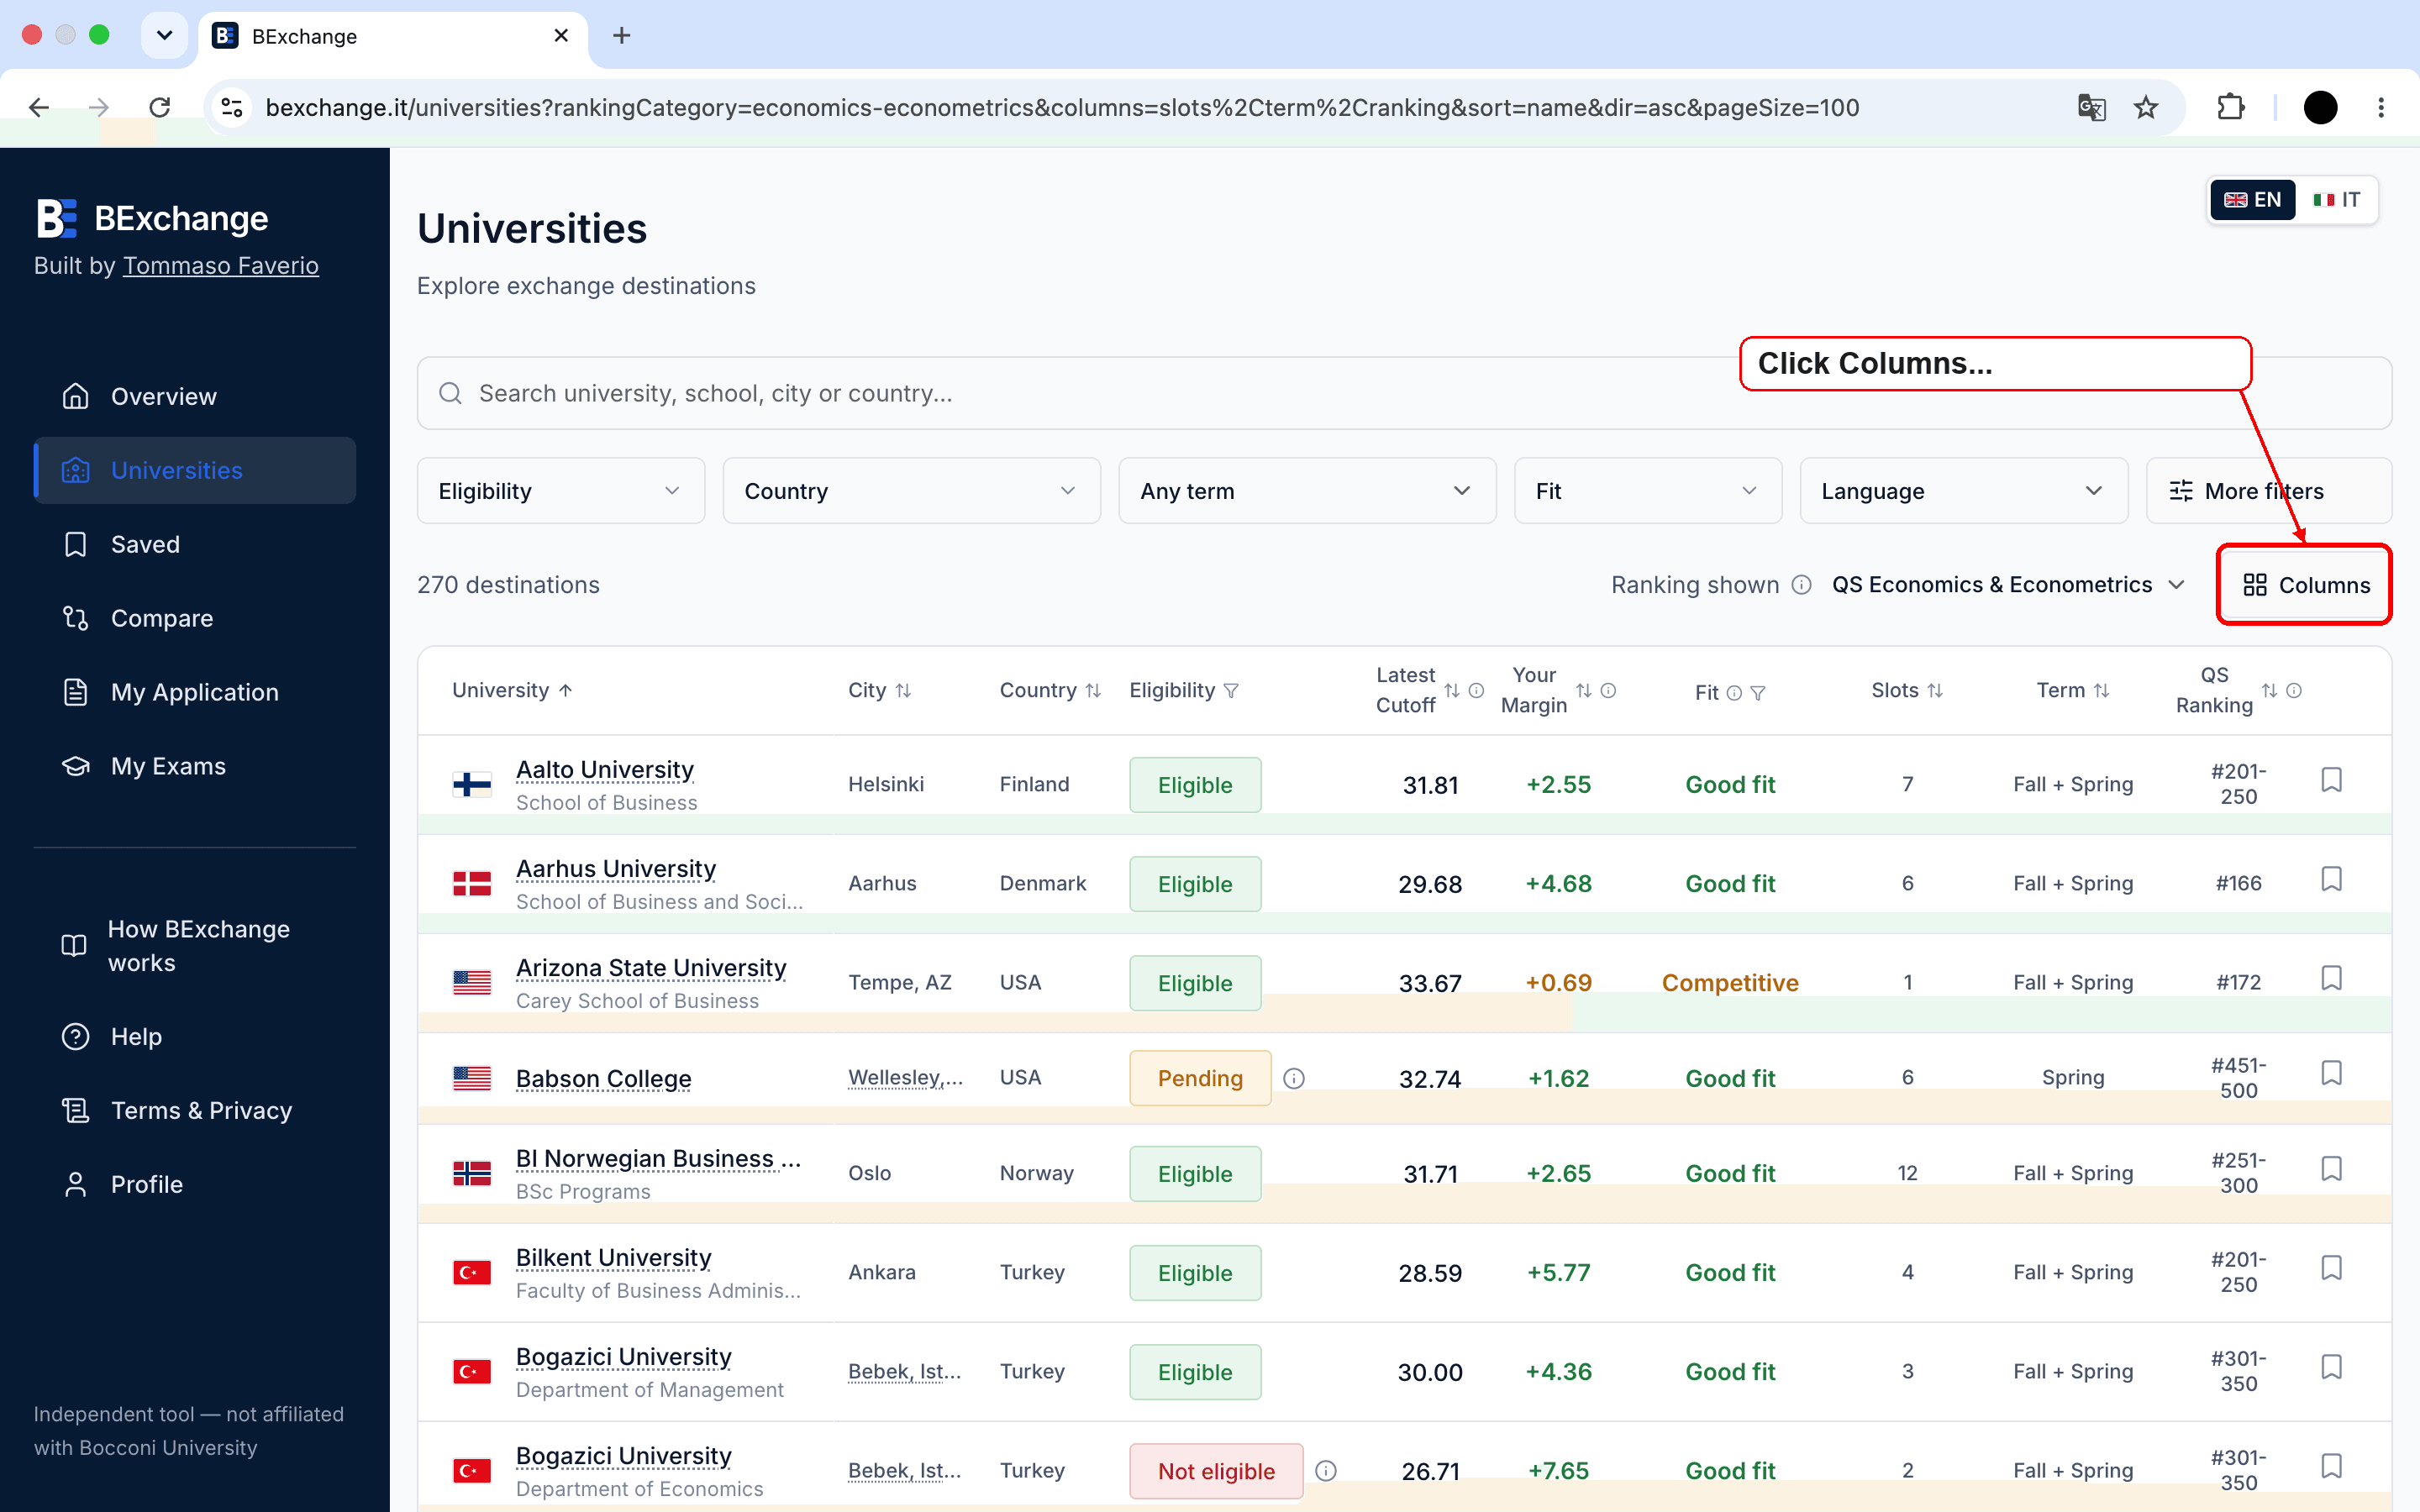
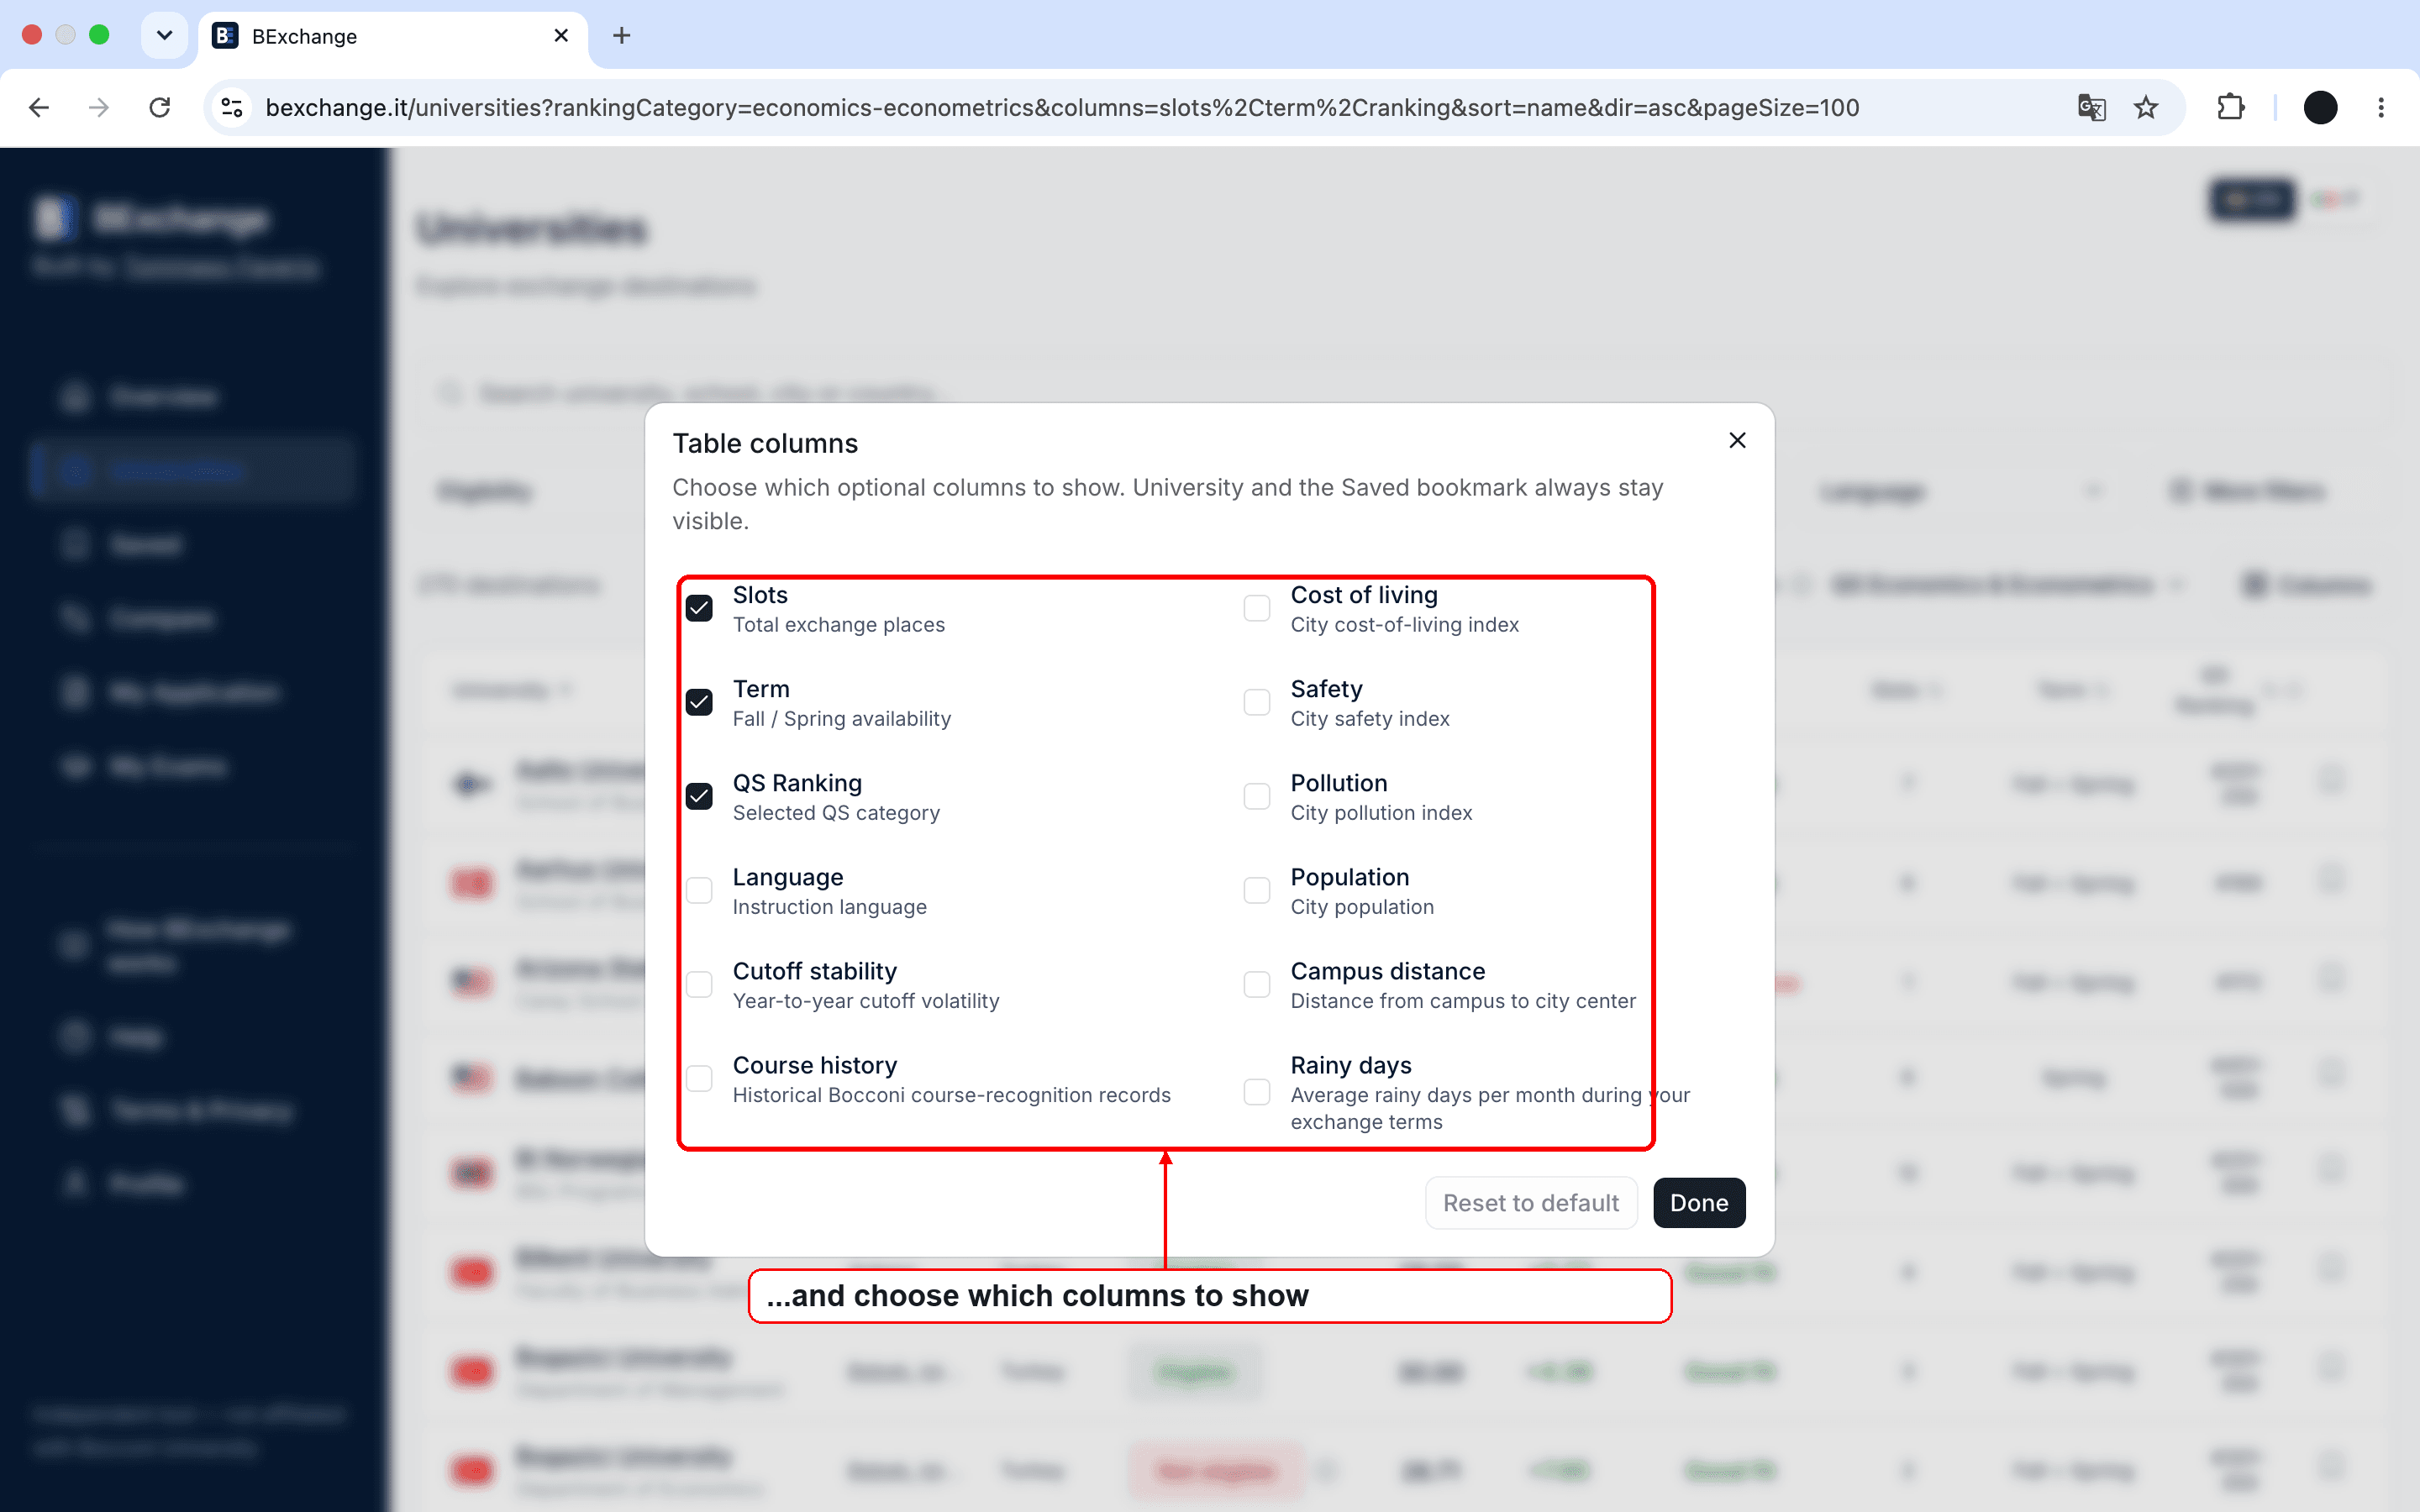
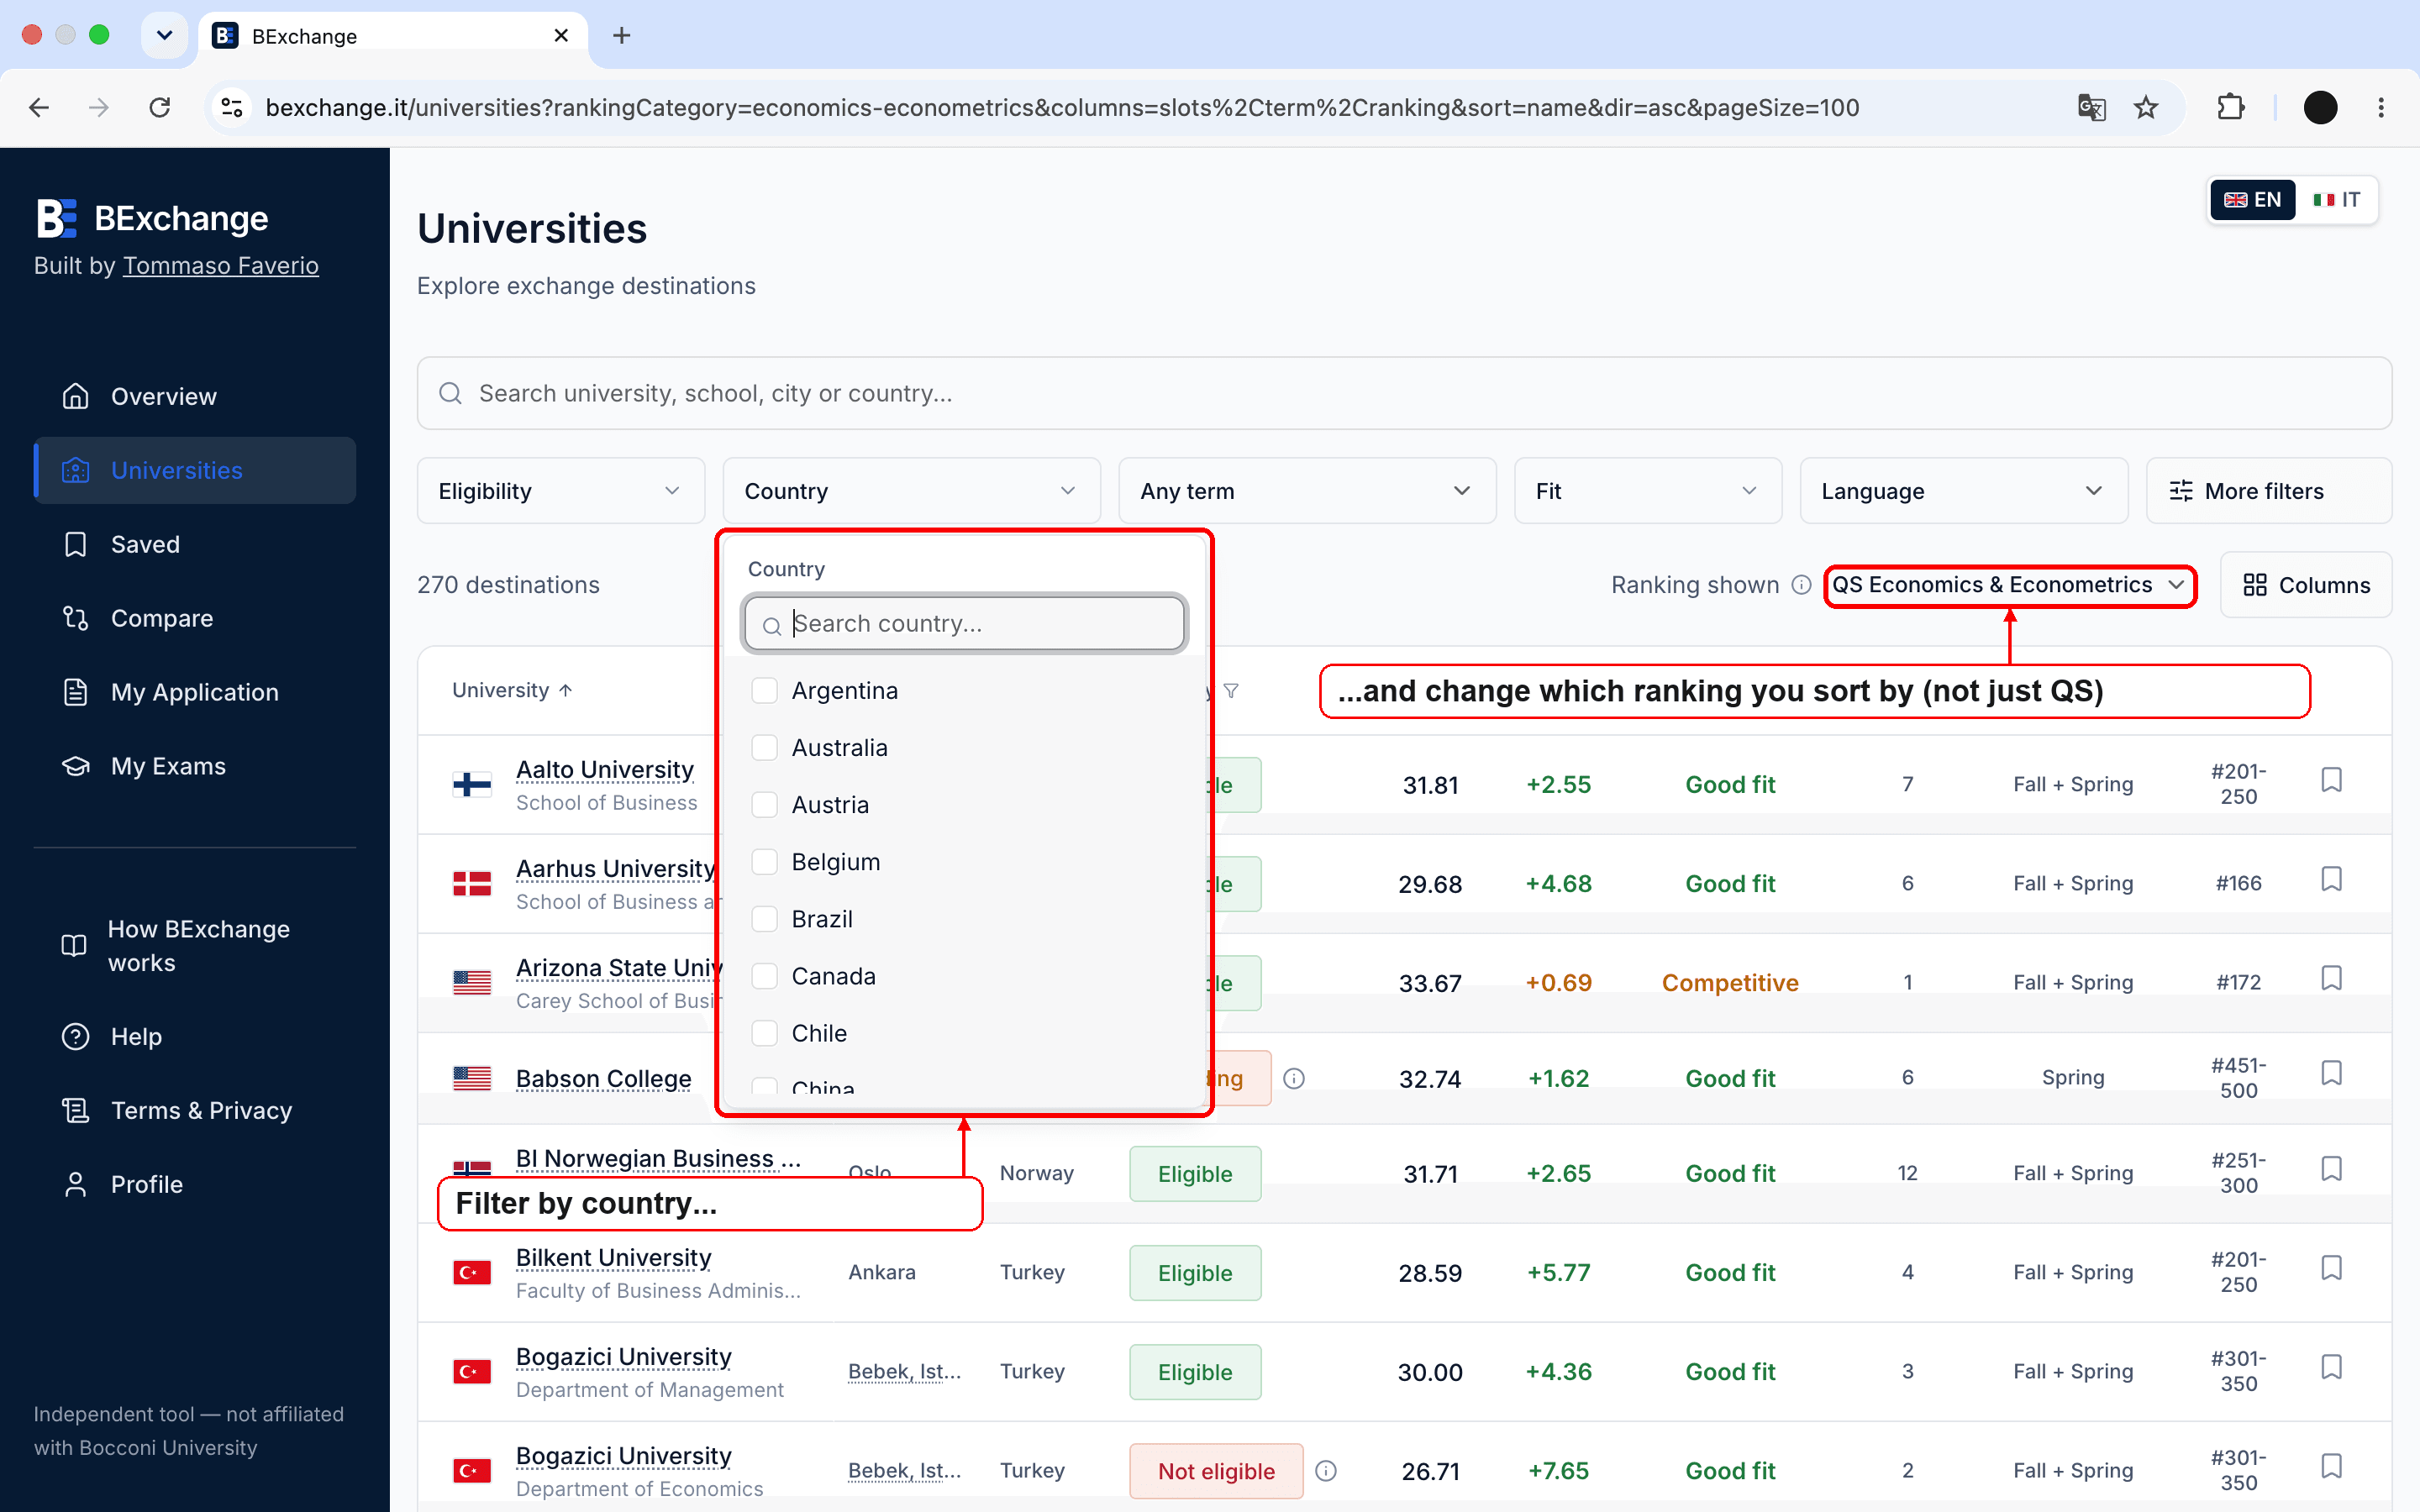
Universities isn't just a table
You can choose which columns to show, change which ranking you sort by, and filter by country and more.
2
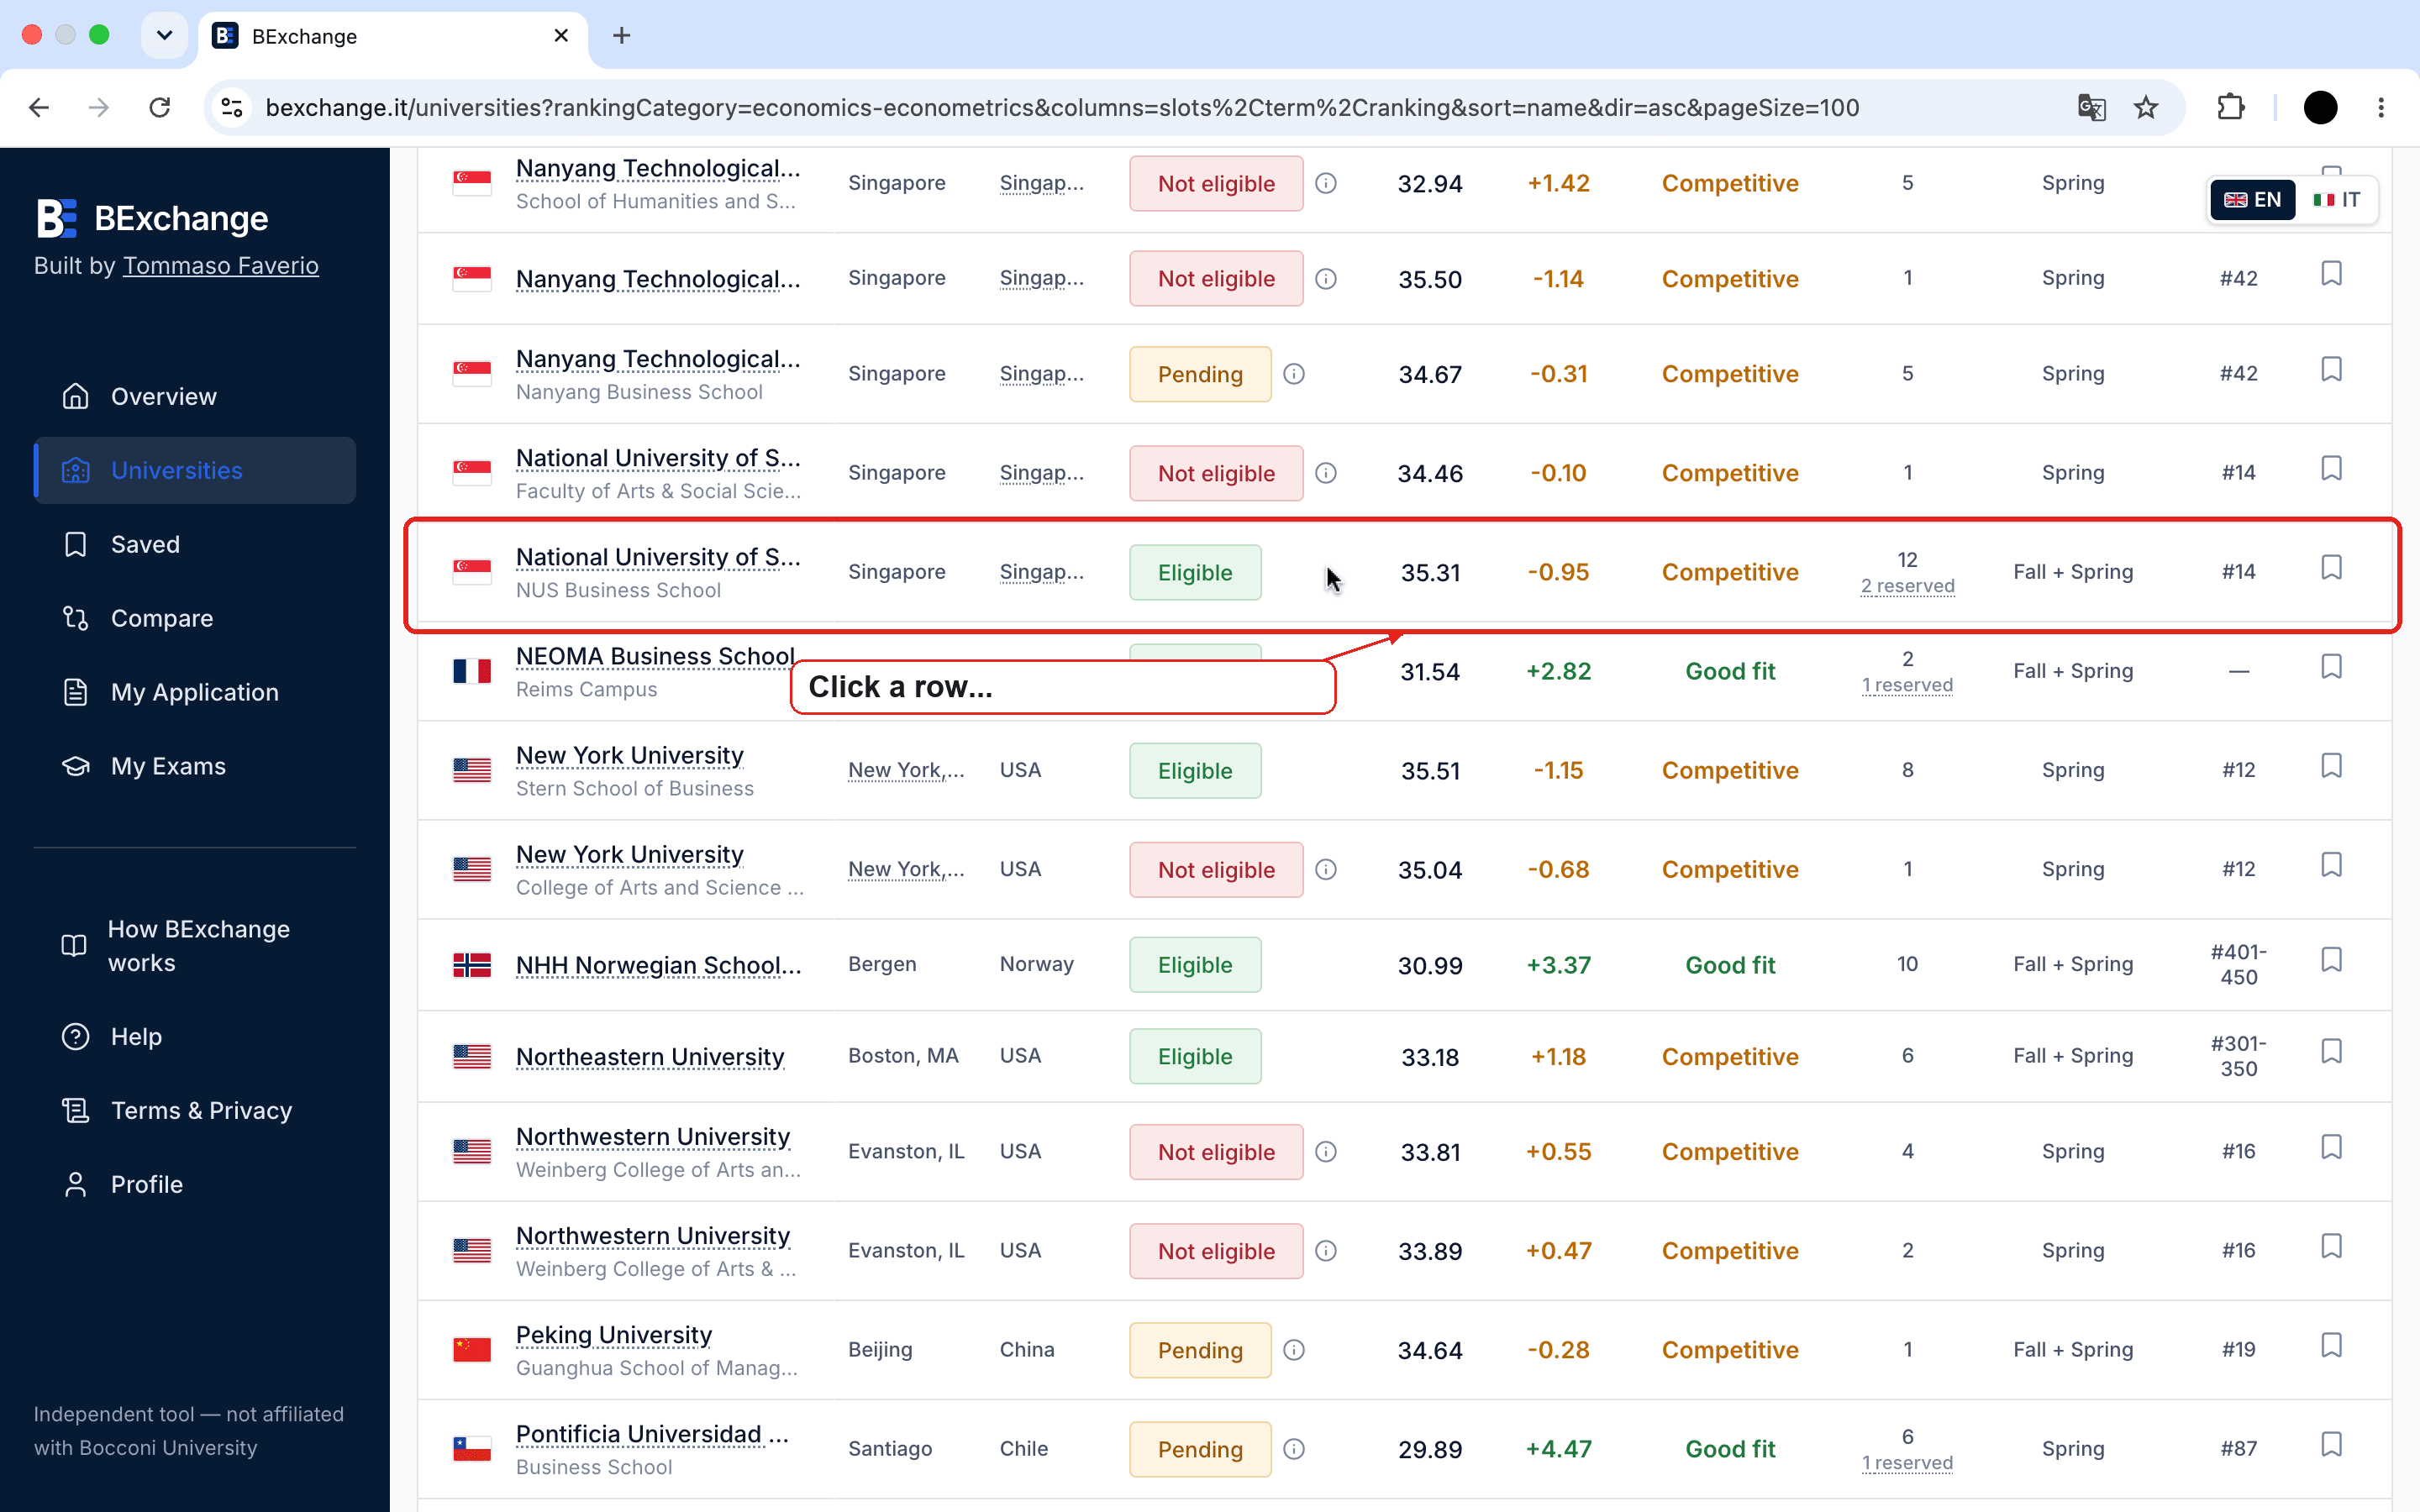
Every row is clickable
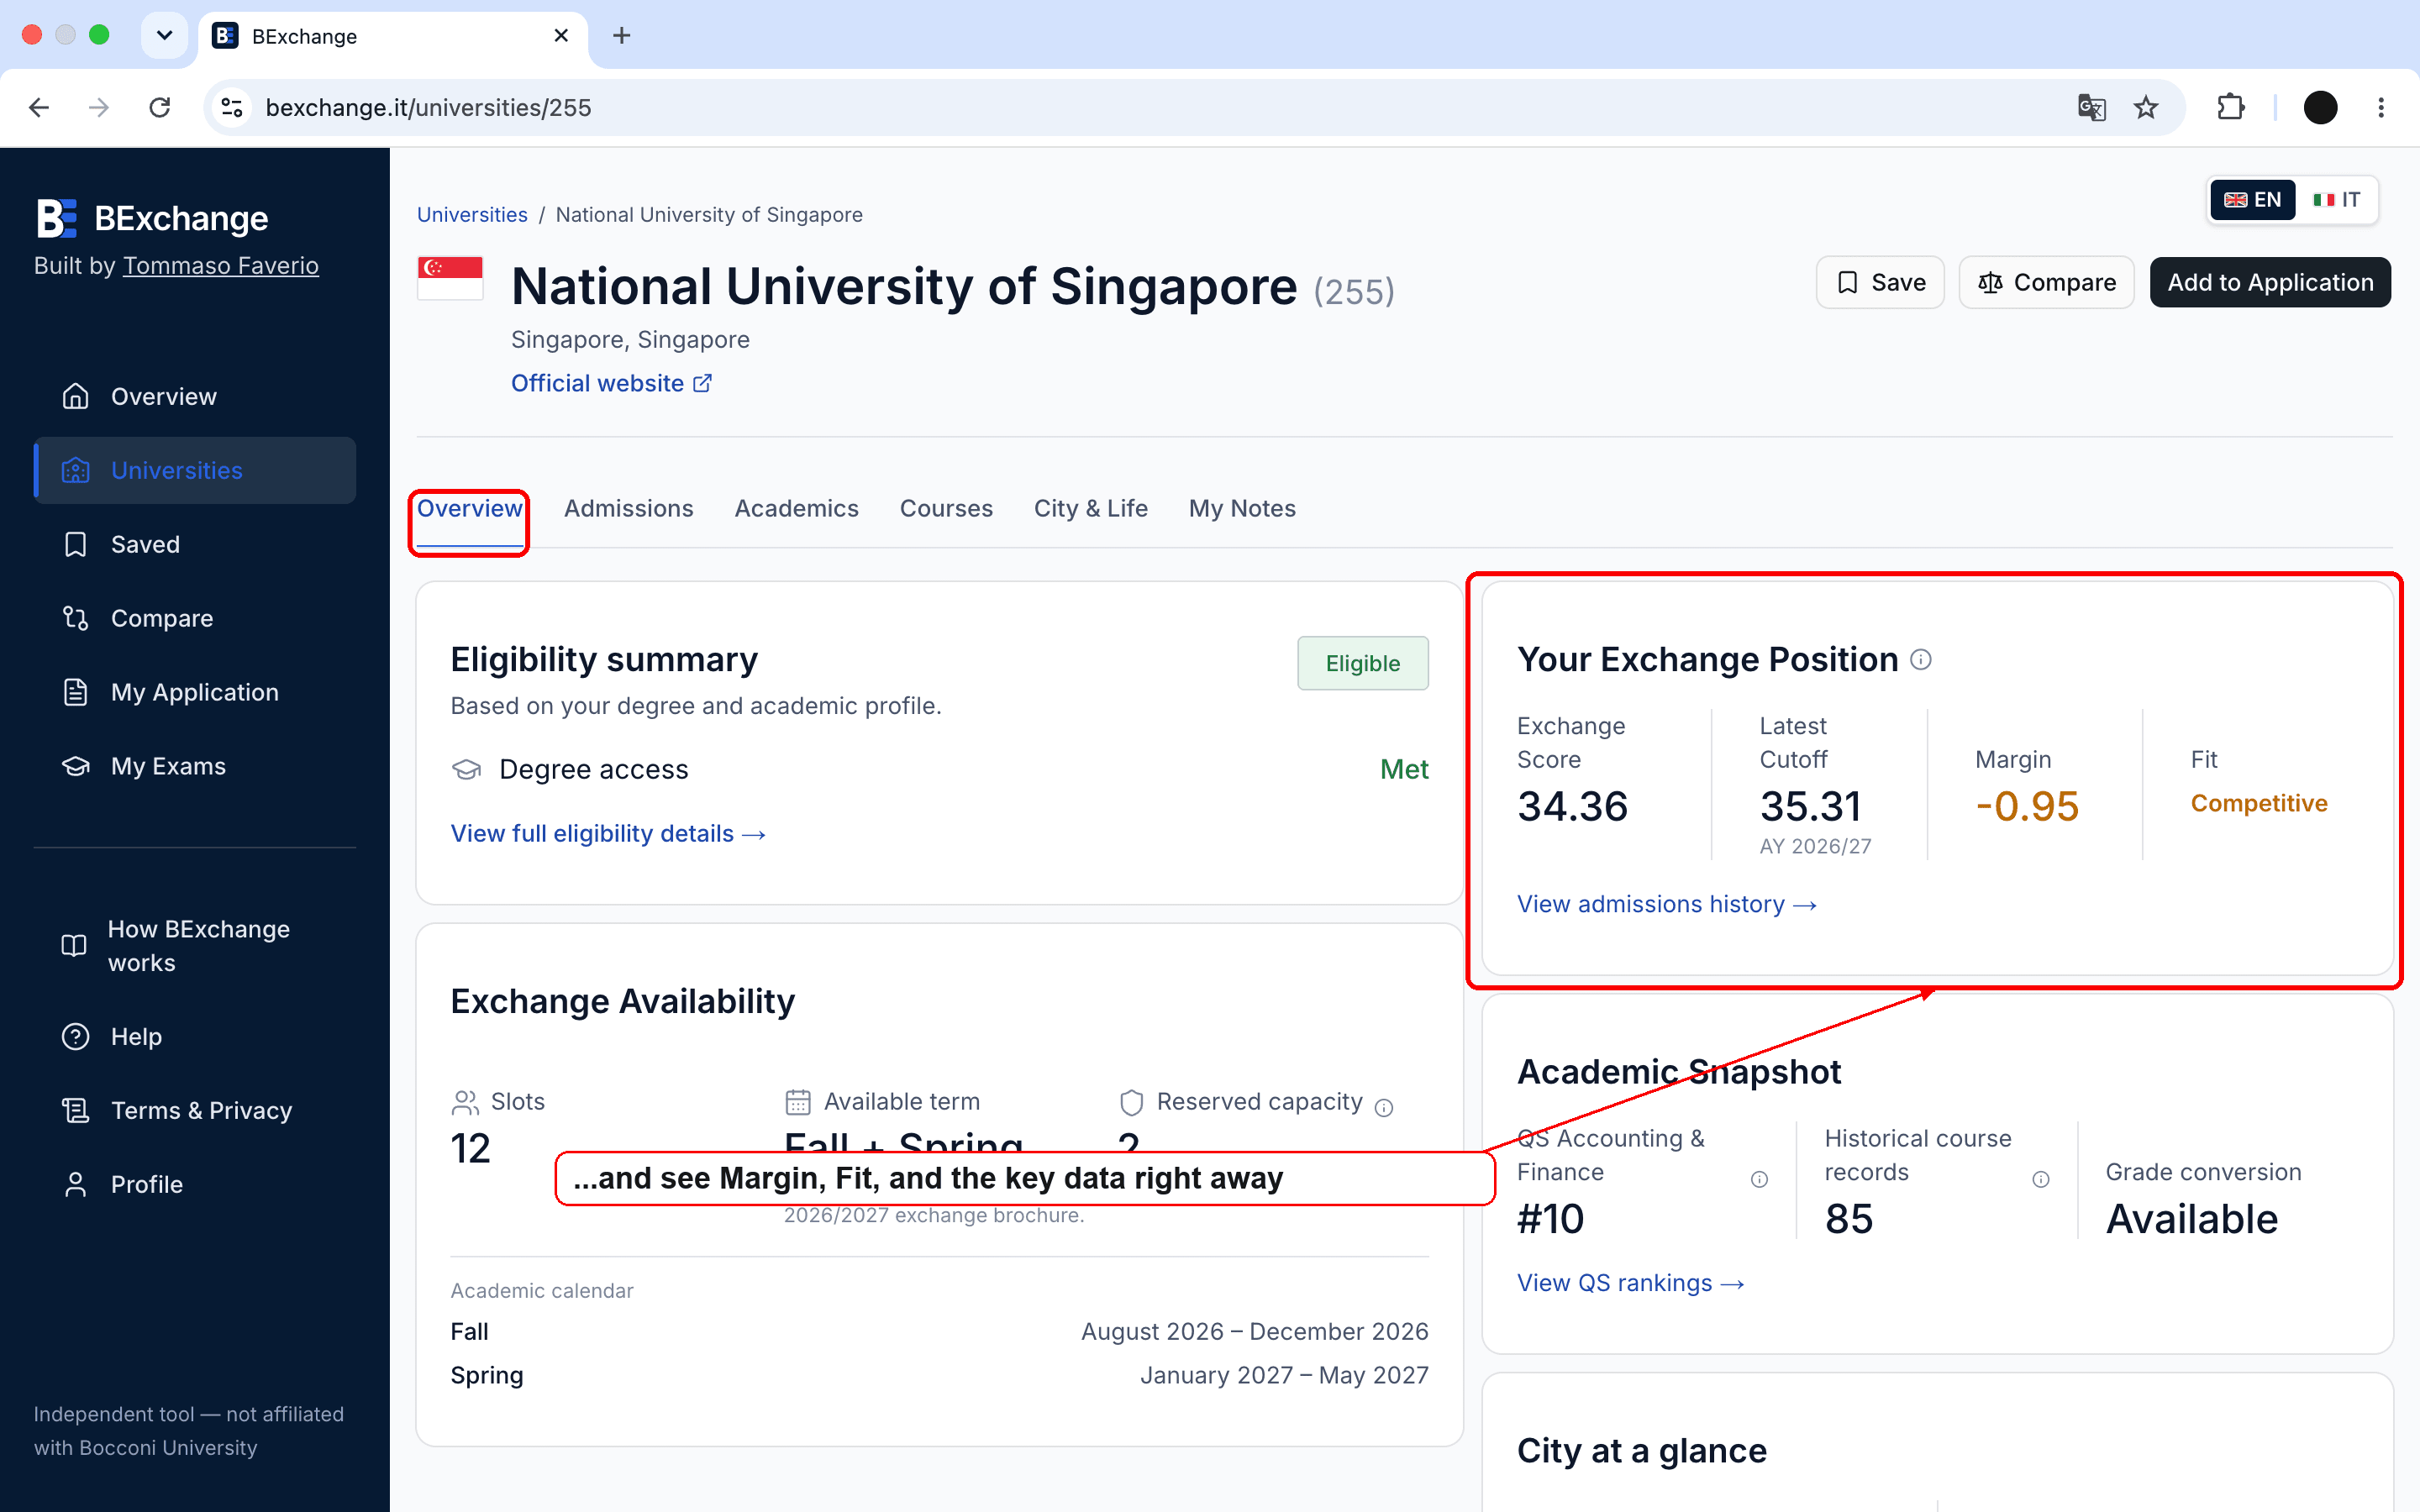
Click any university in the list to open its full profile, with your margin and fit already calculated.
3
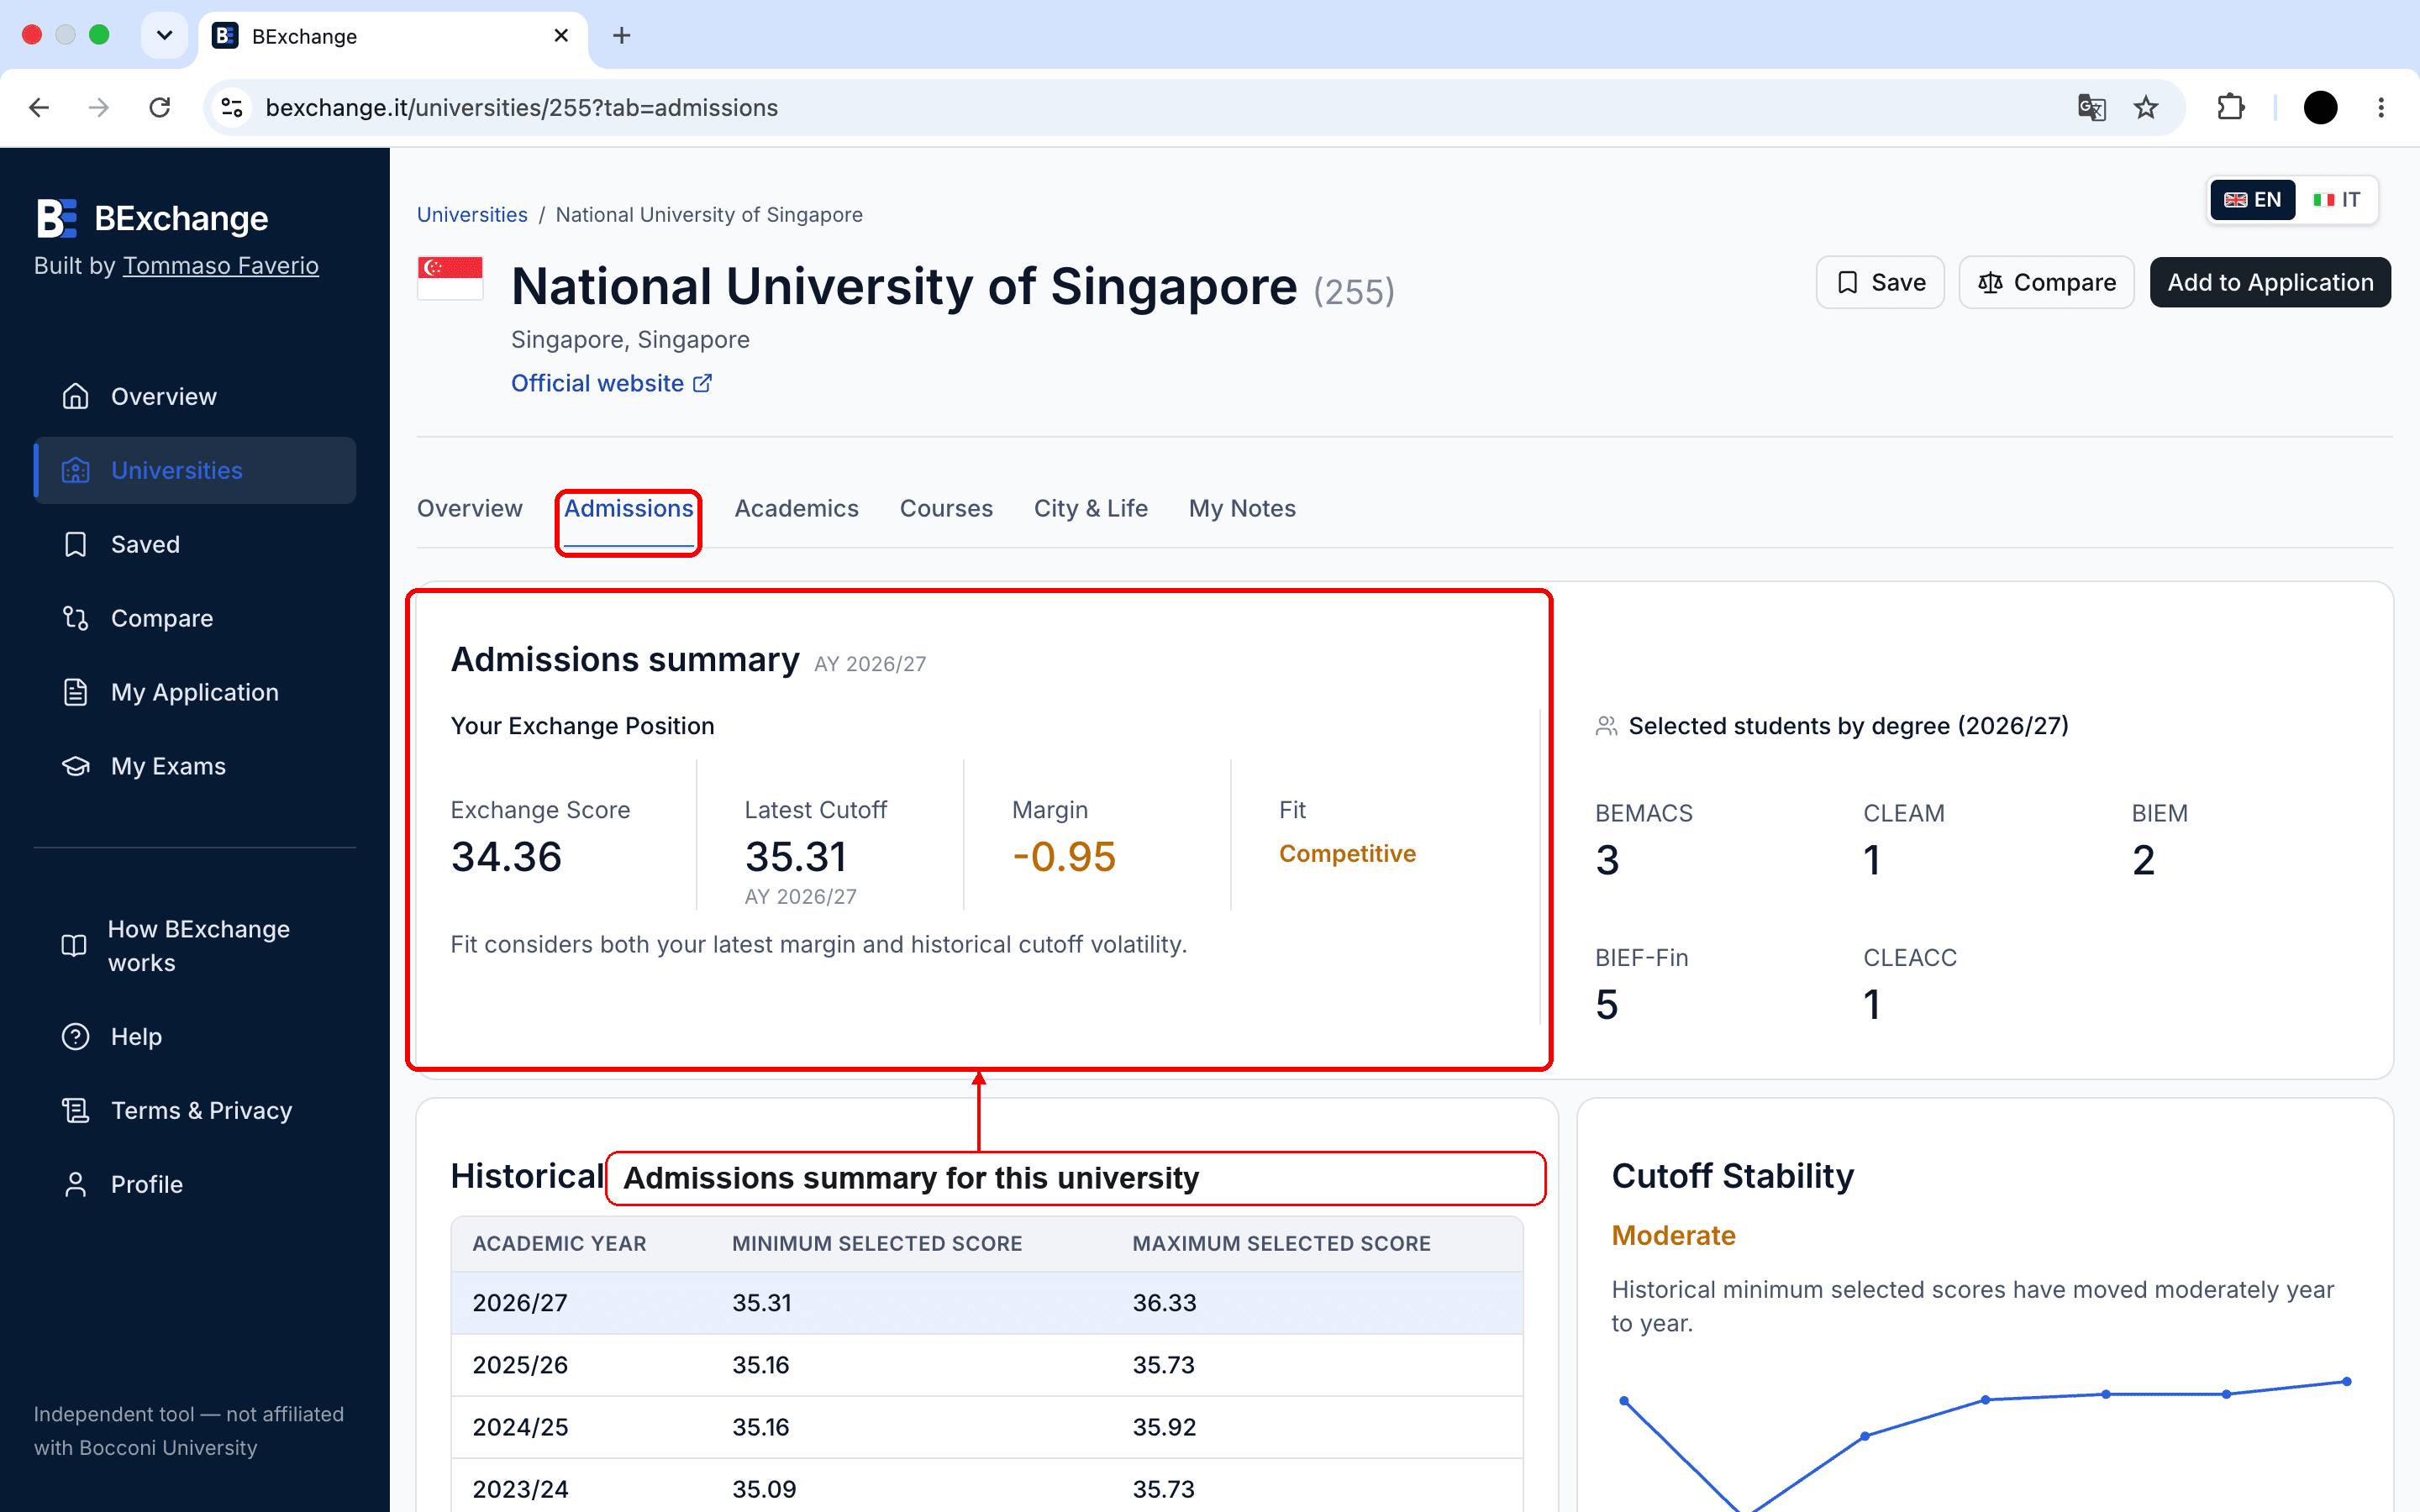
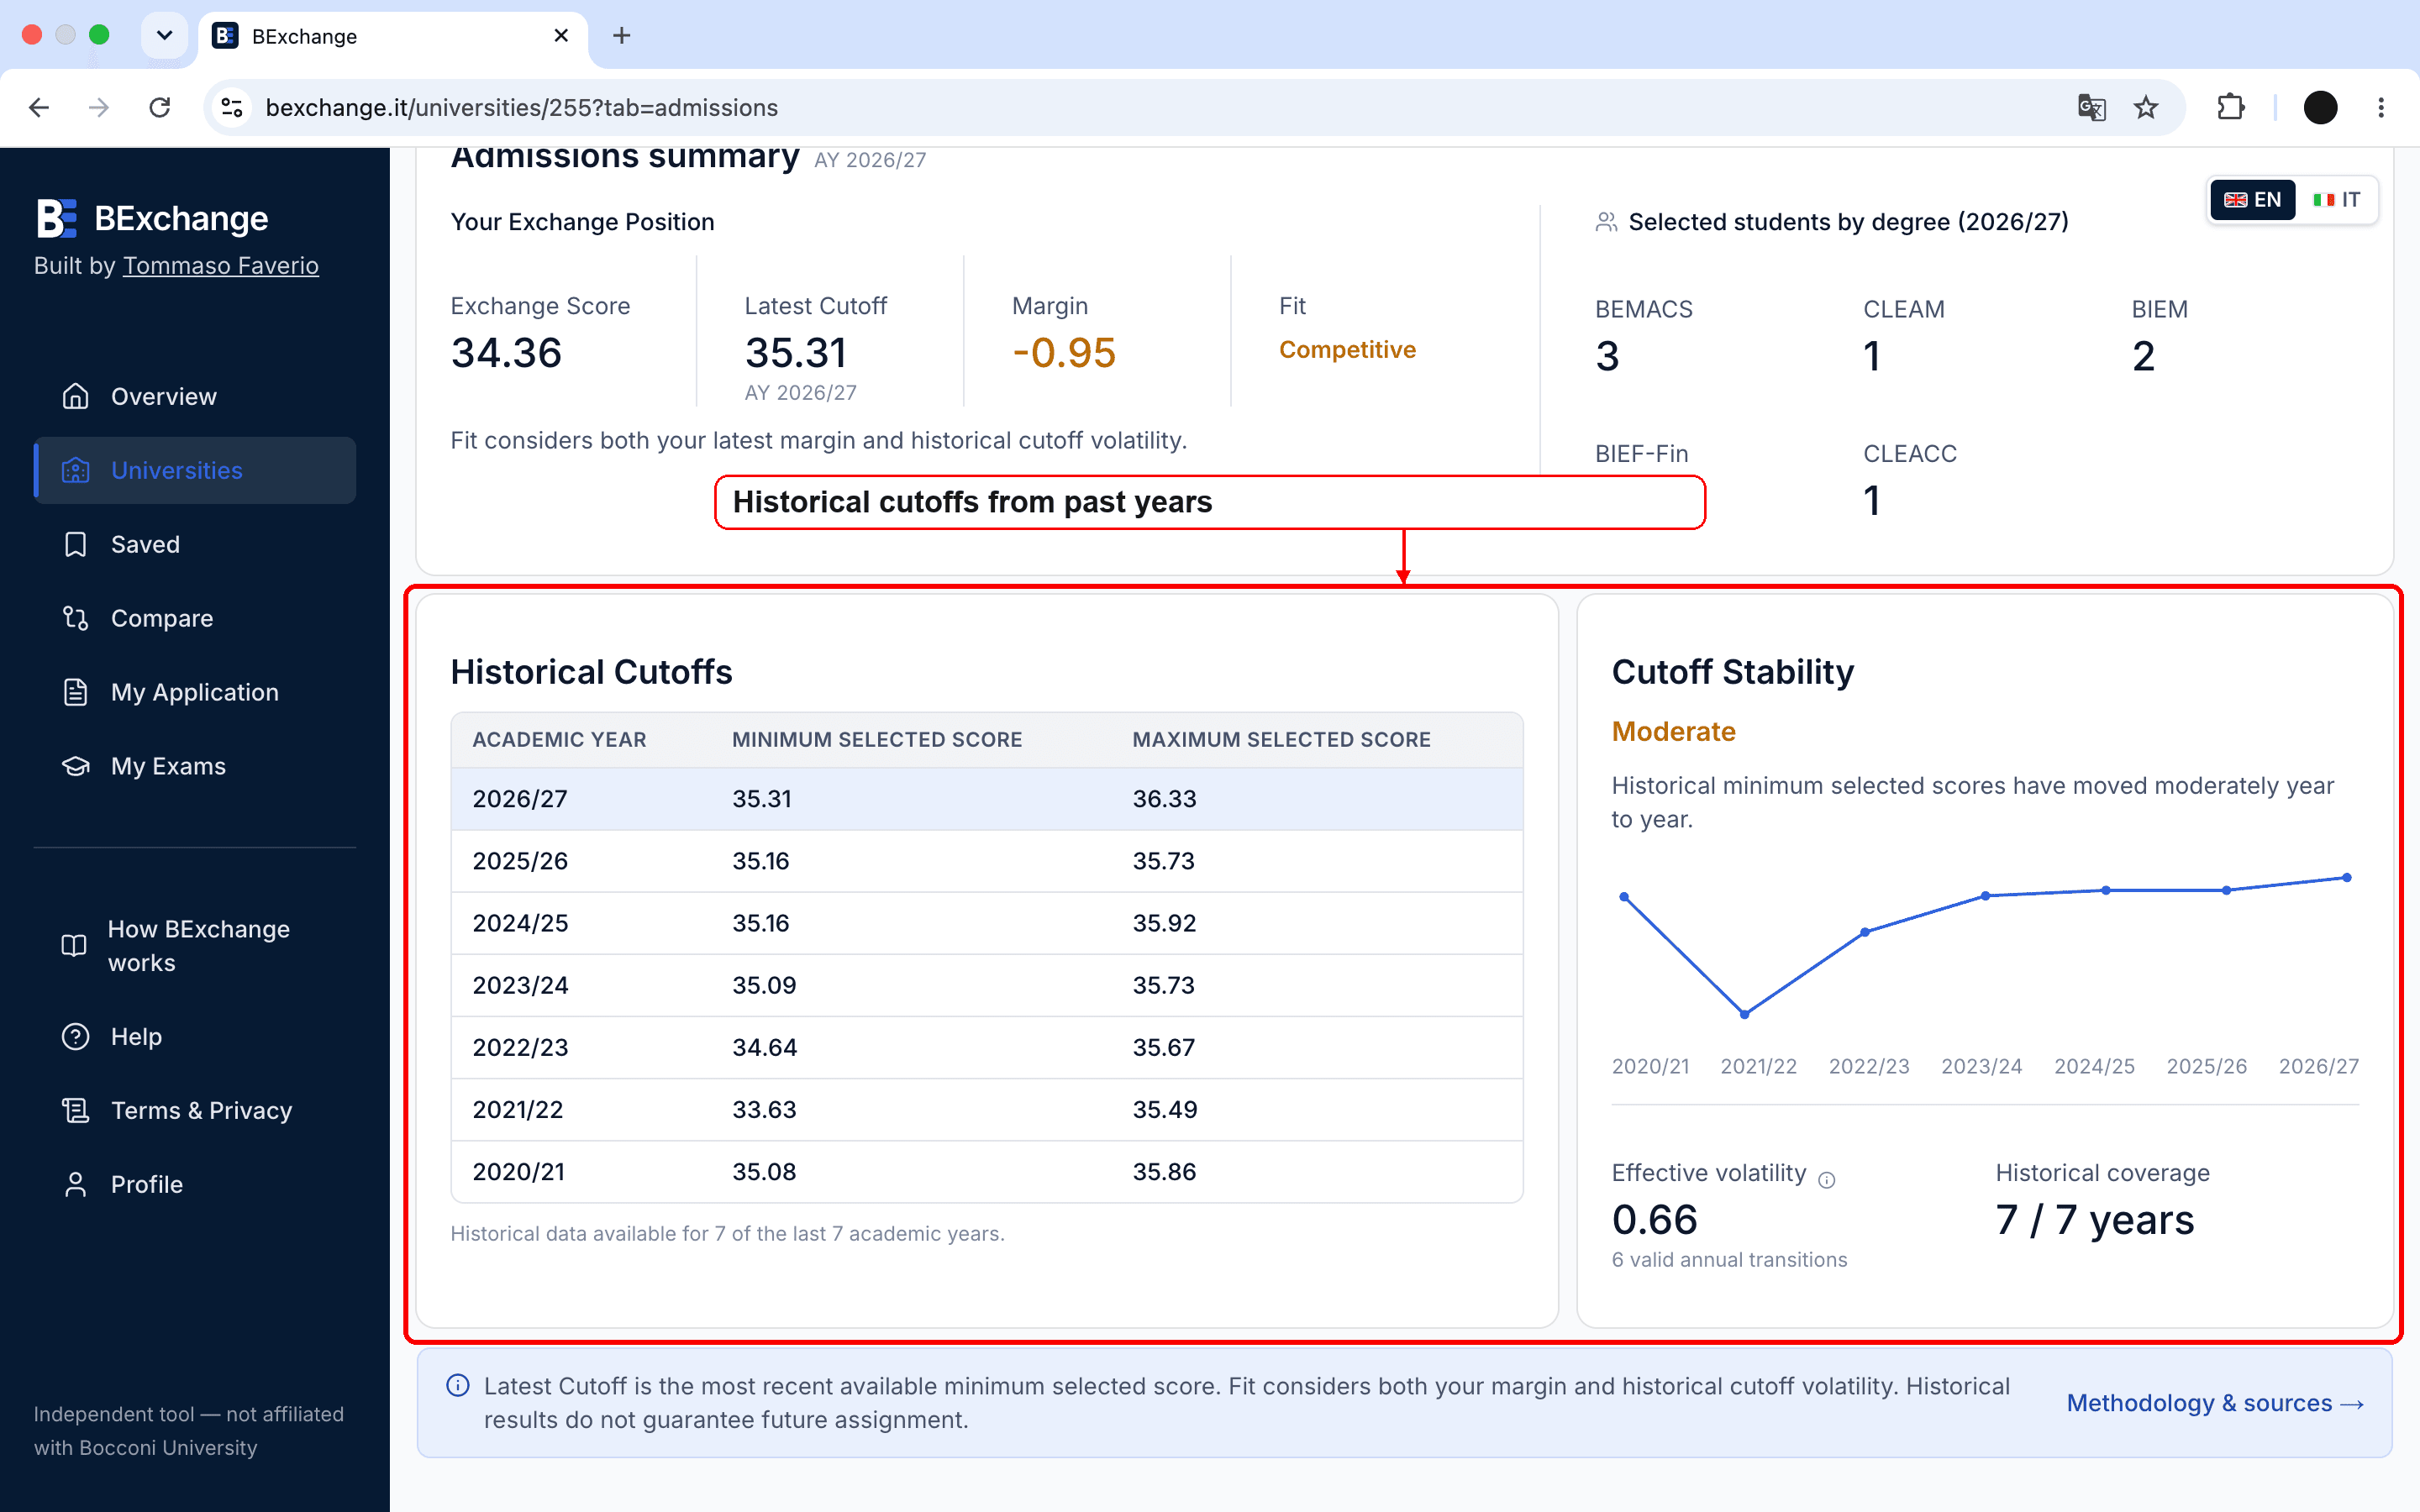
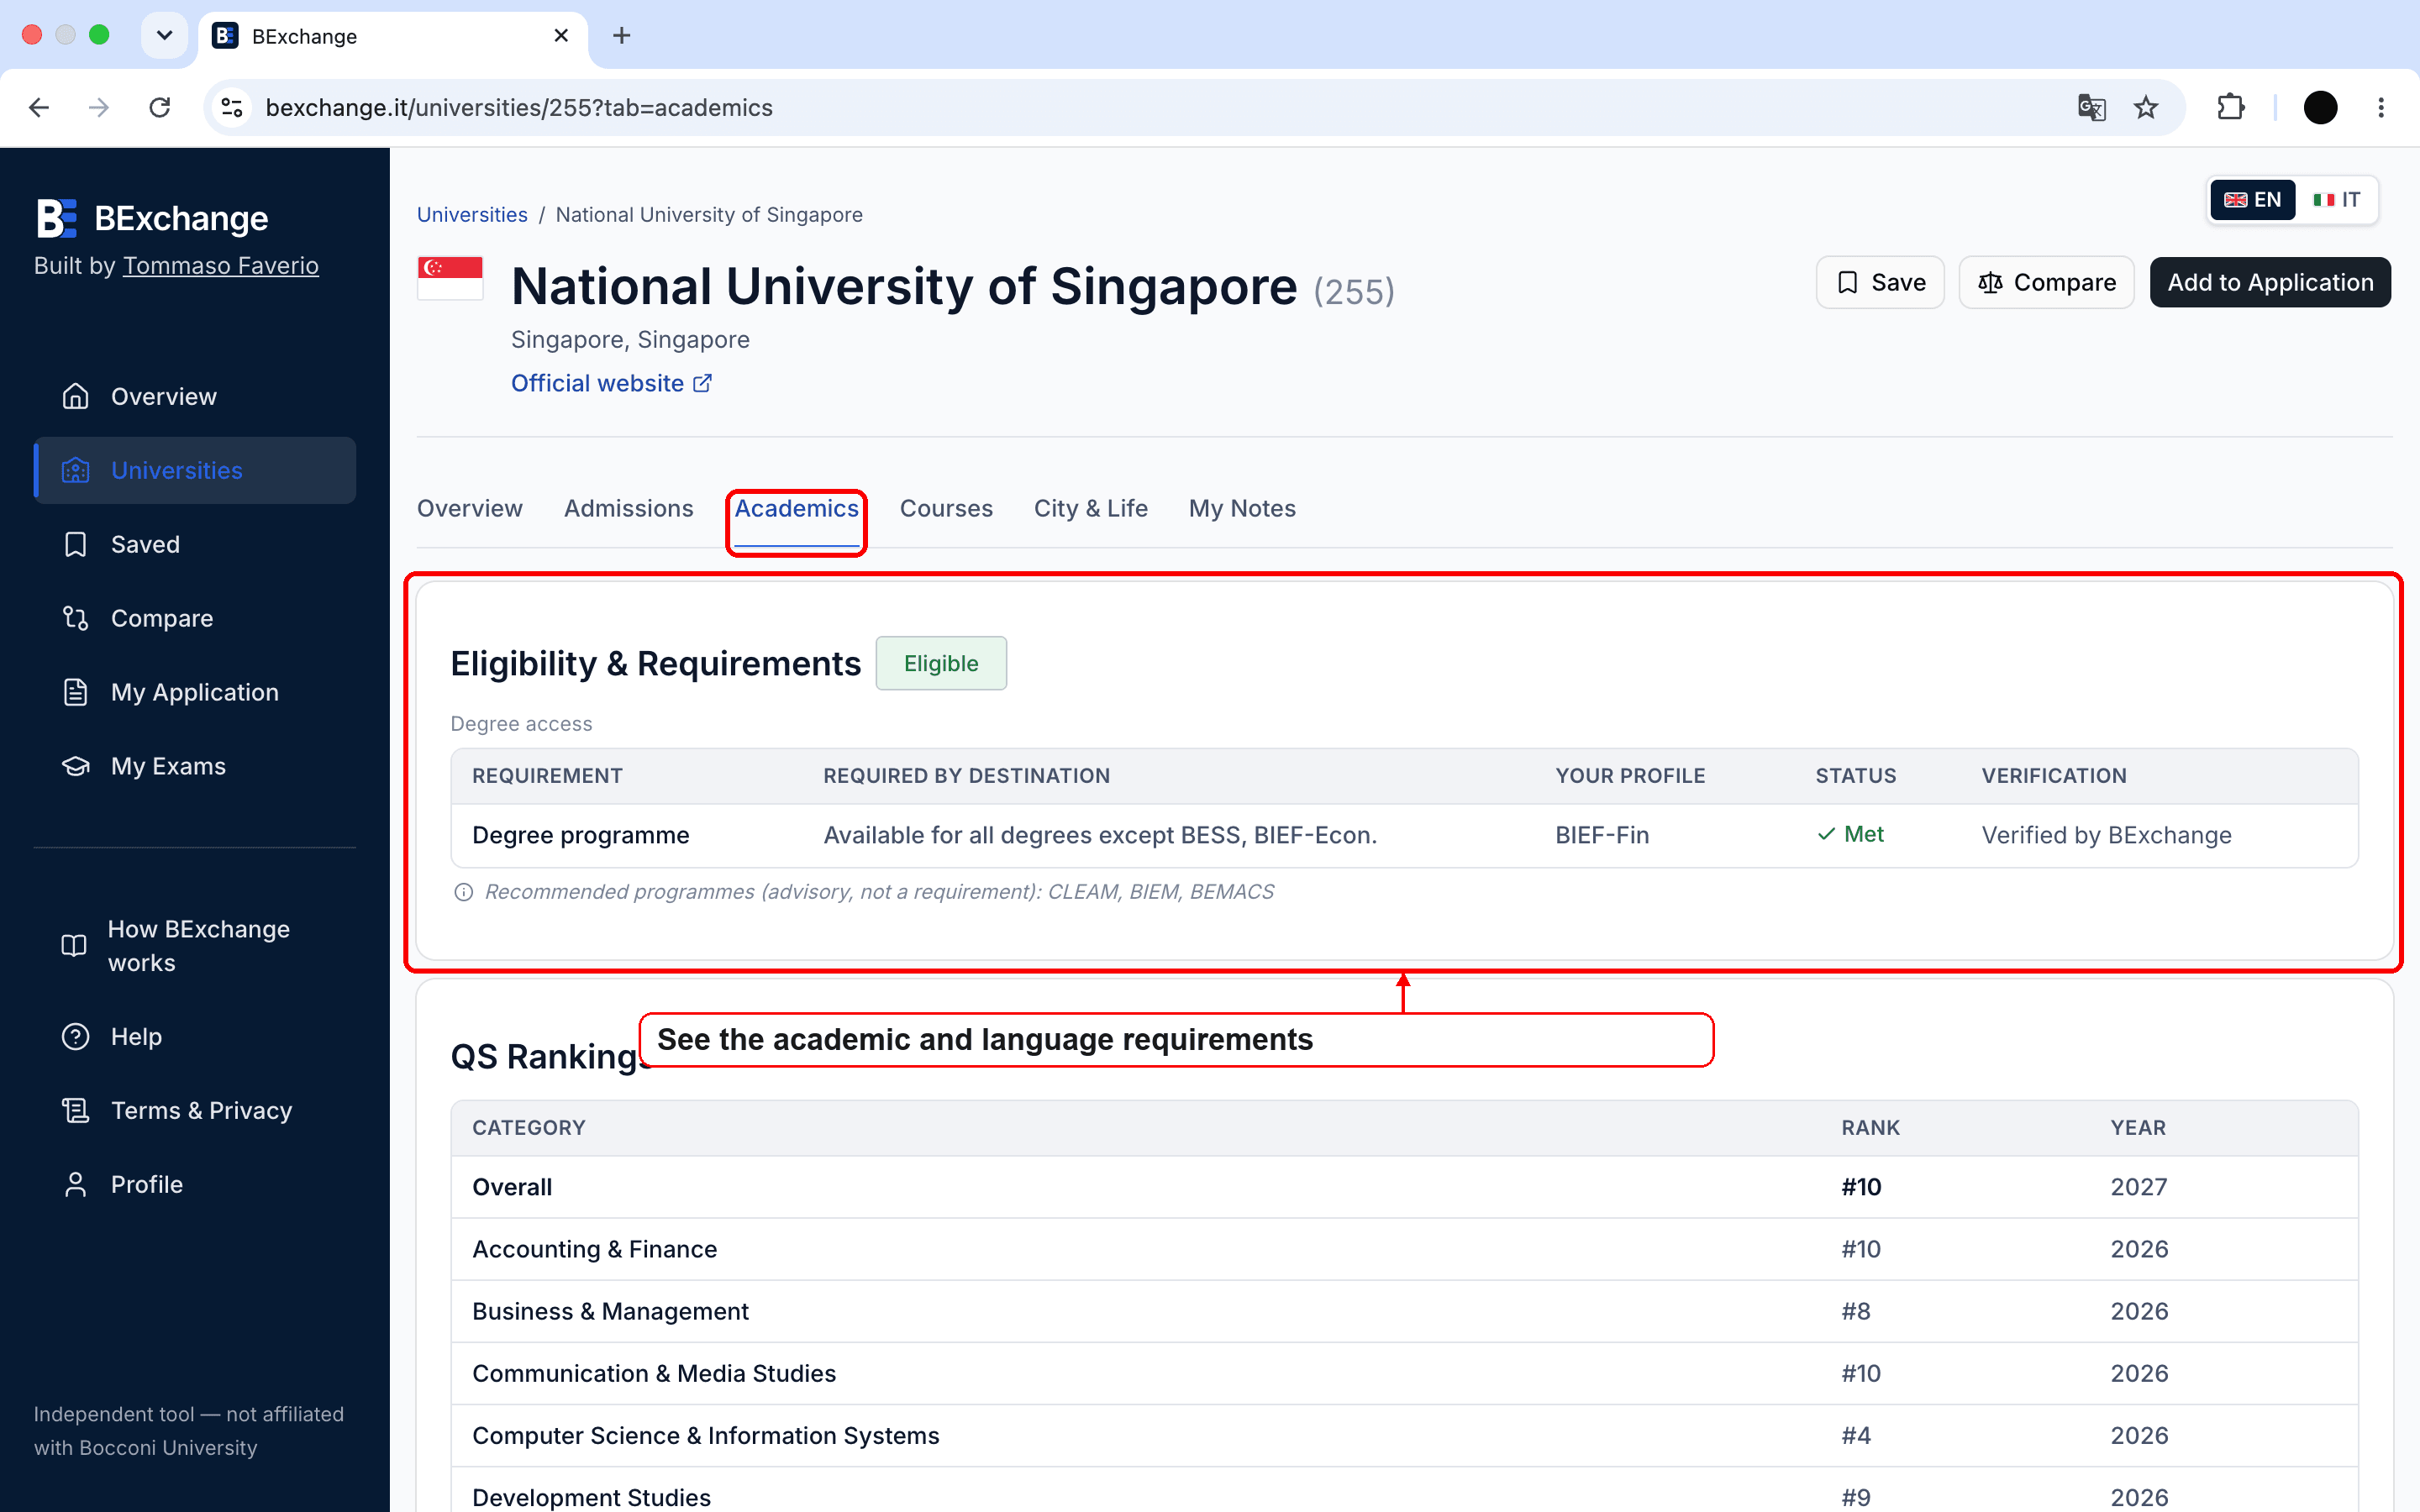
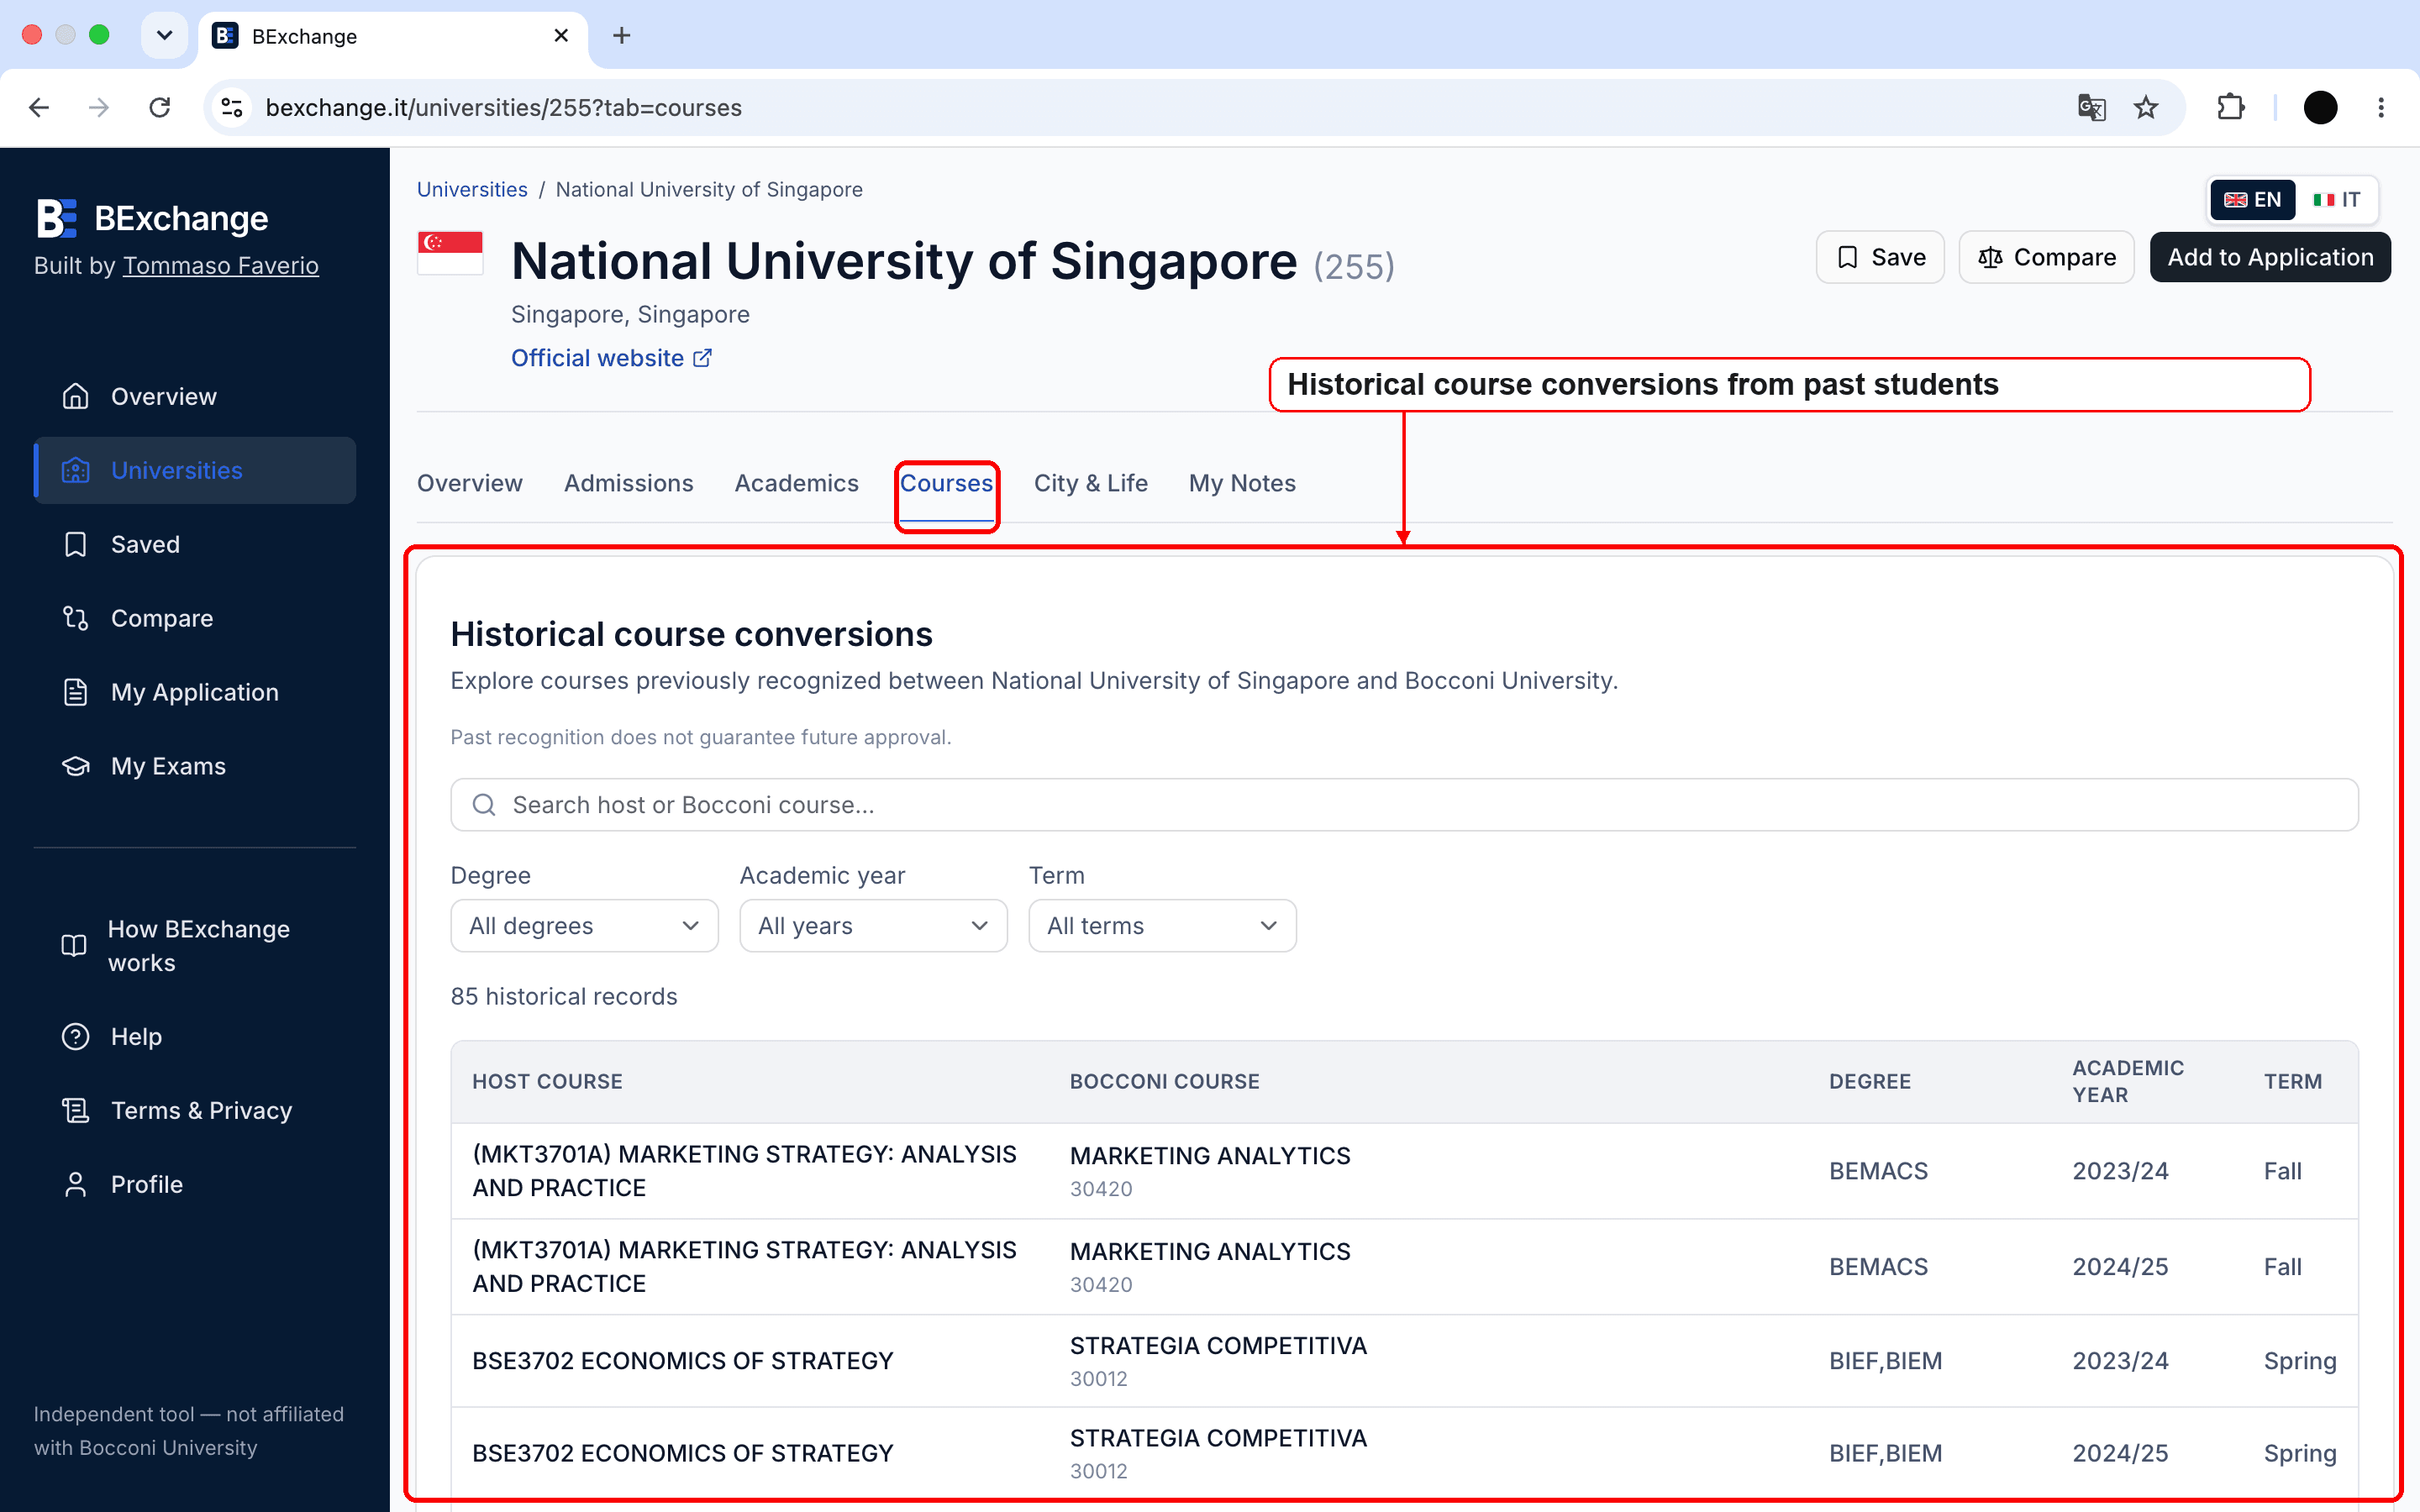
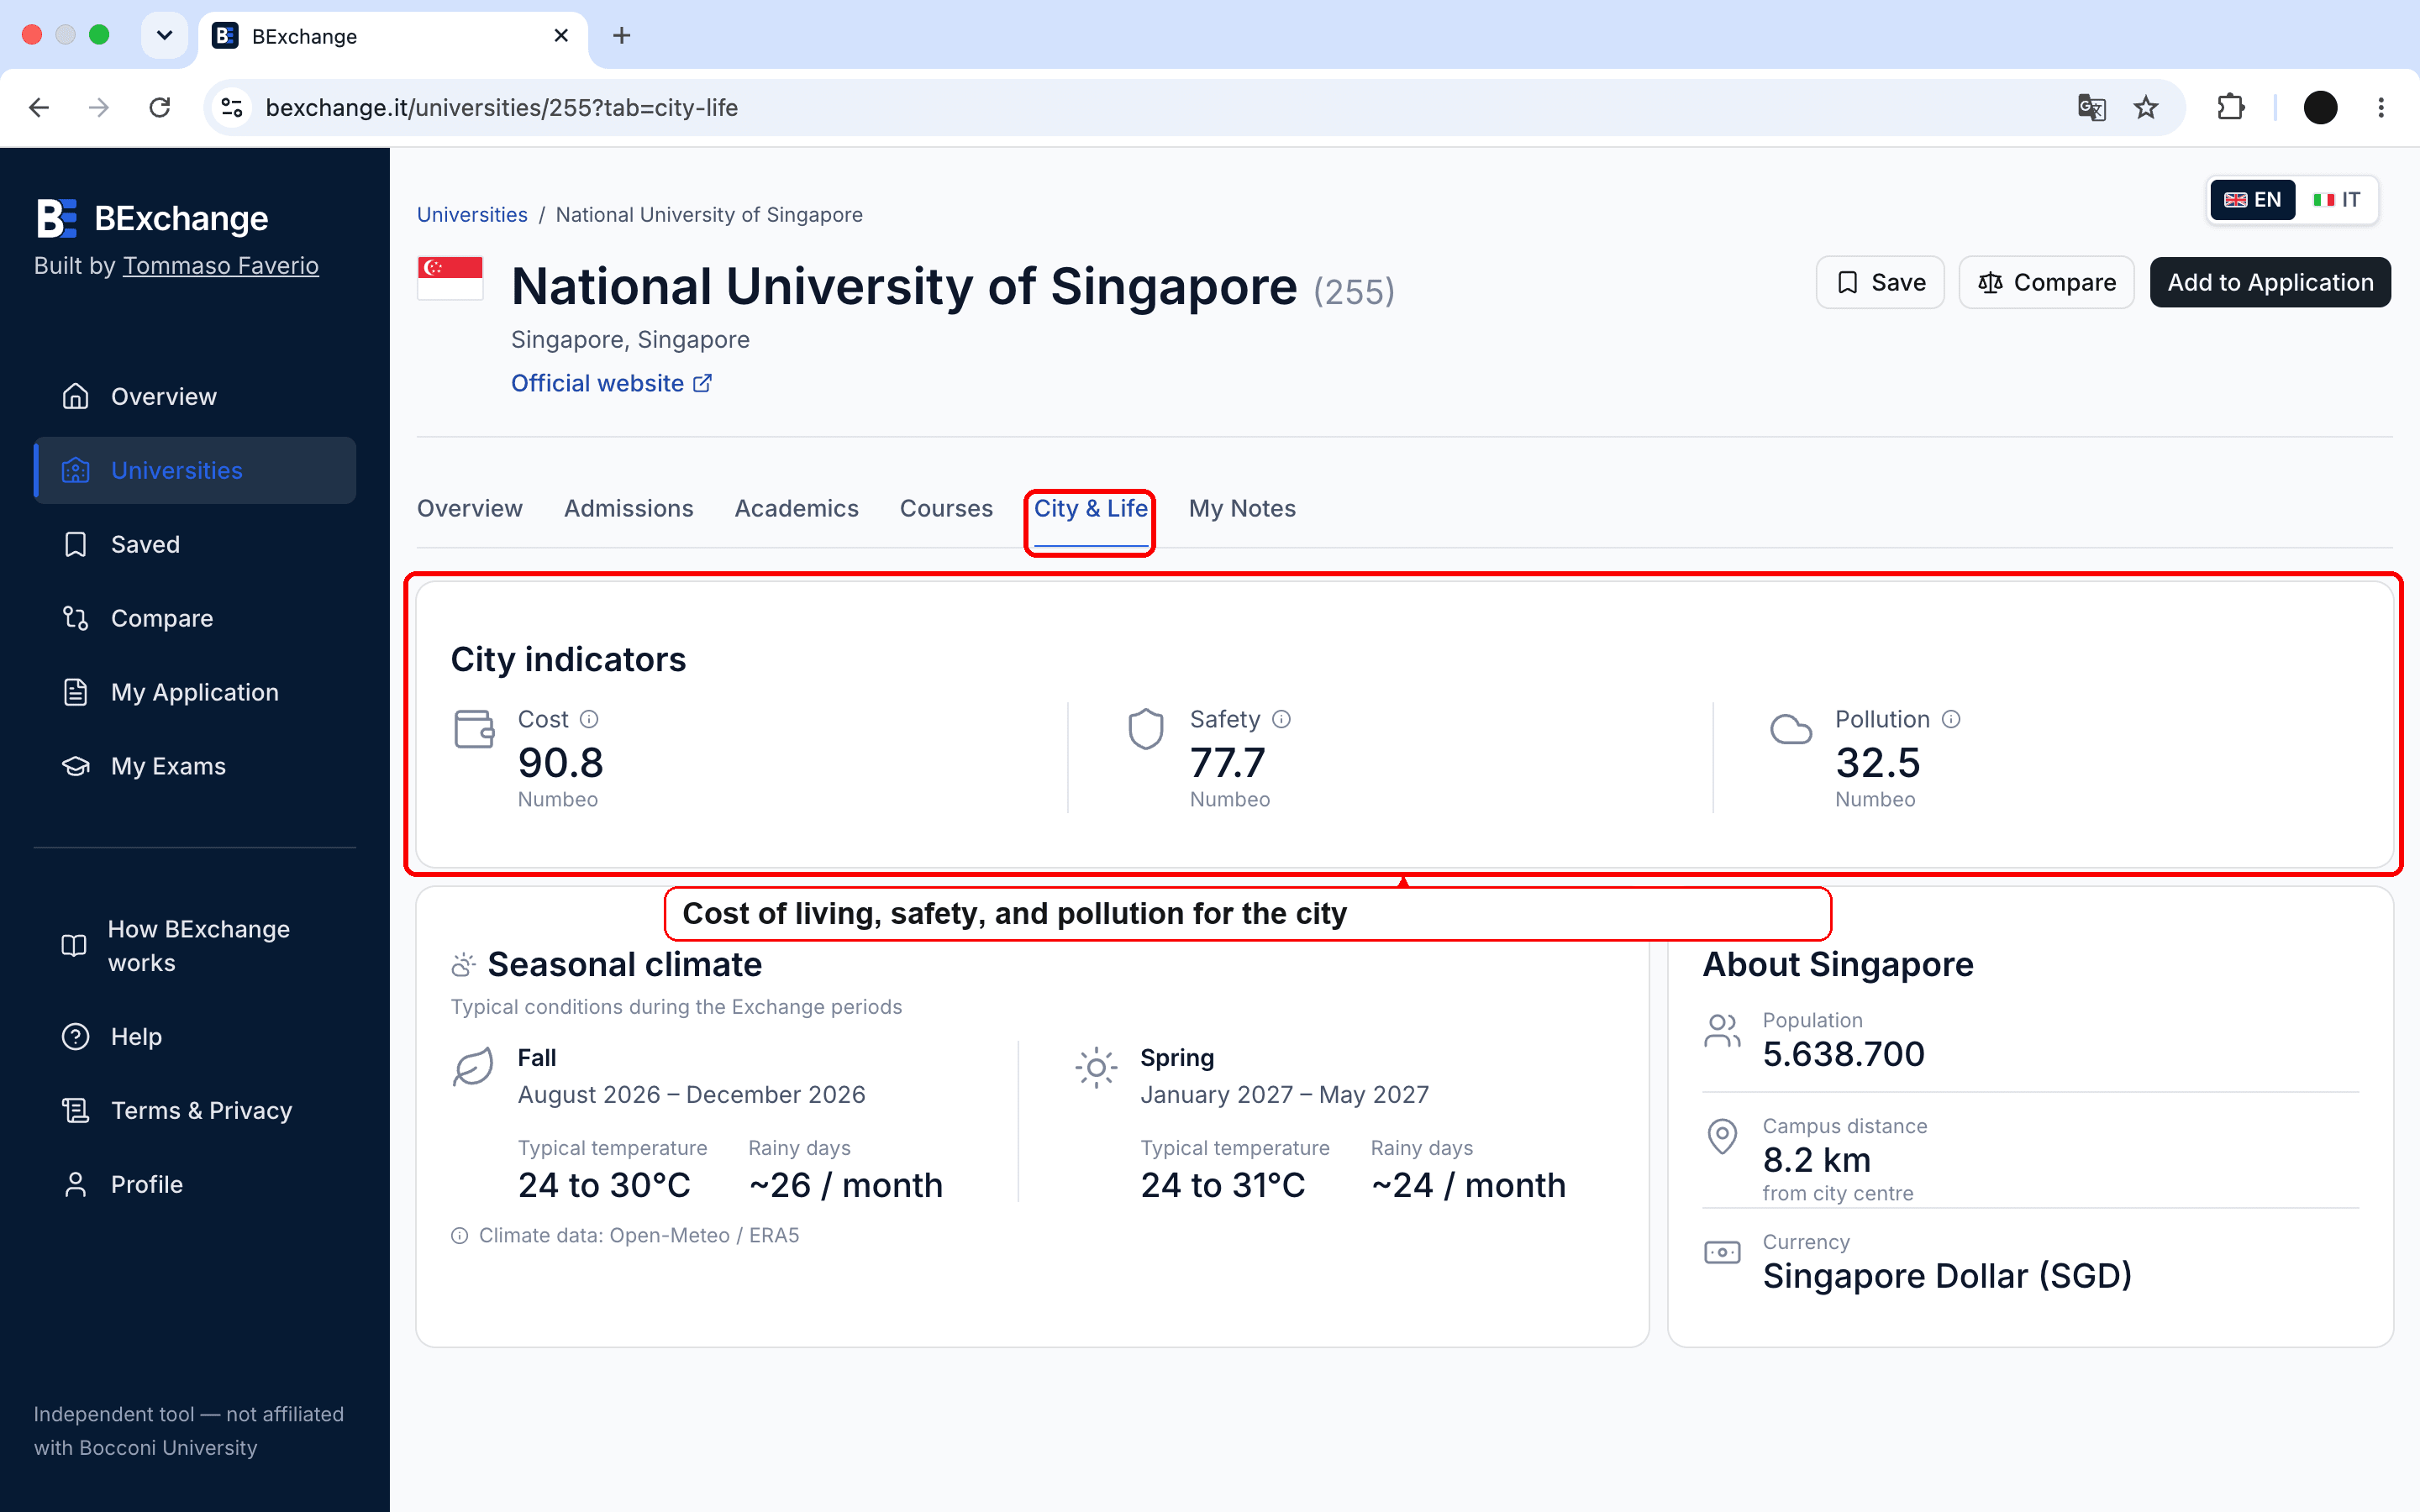
Explore every section of the university detail page
Use the top bar to switch between Admissions, Academics, Courses, and City & Life.
4
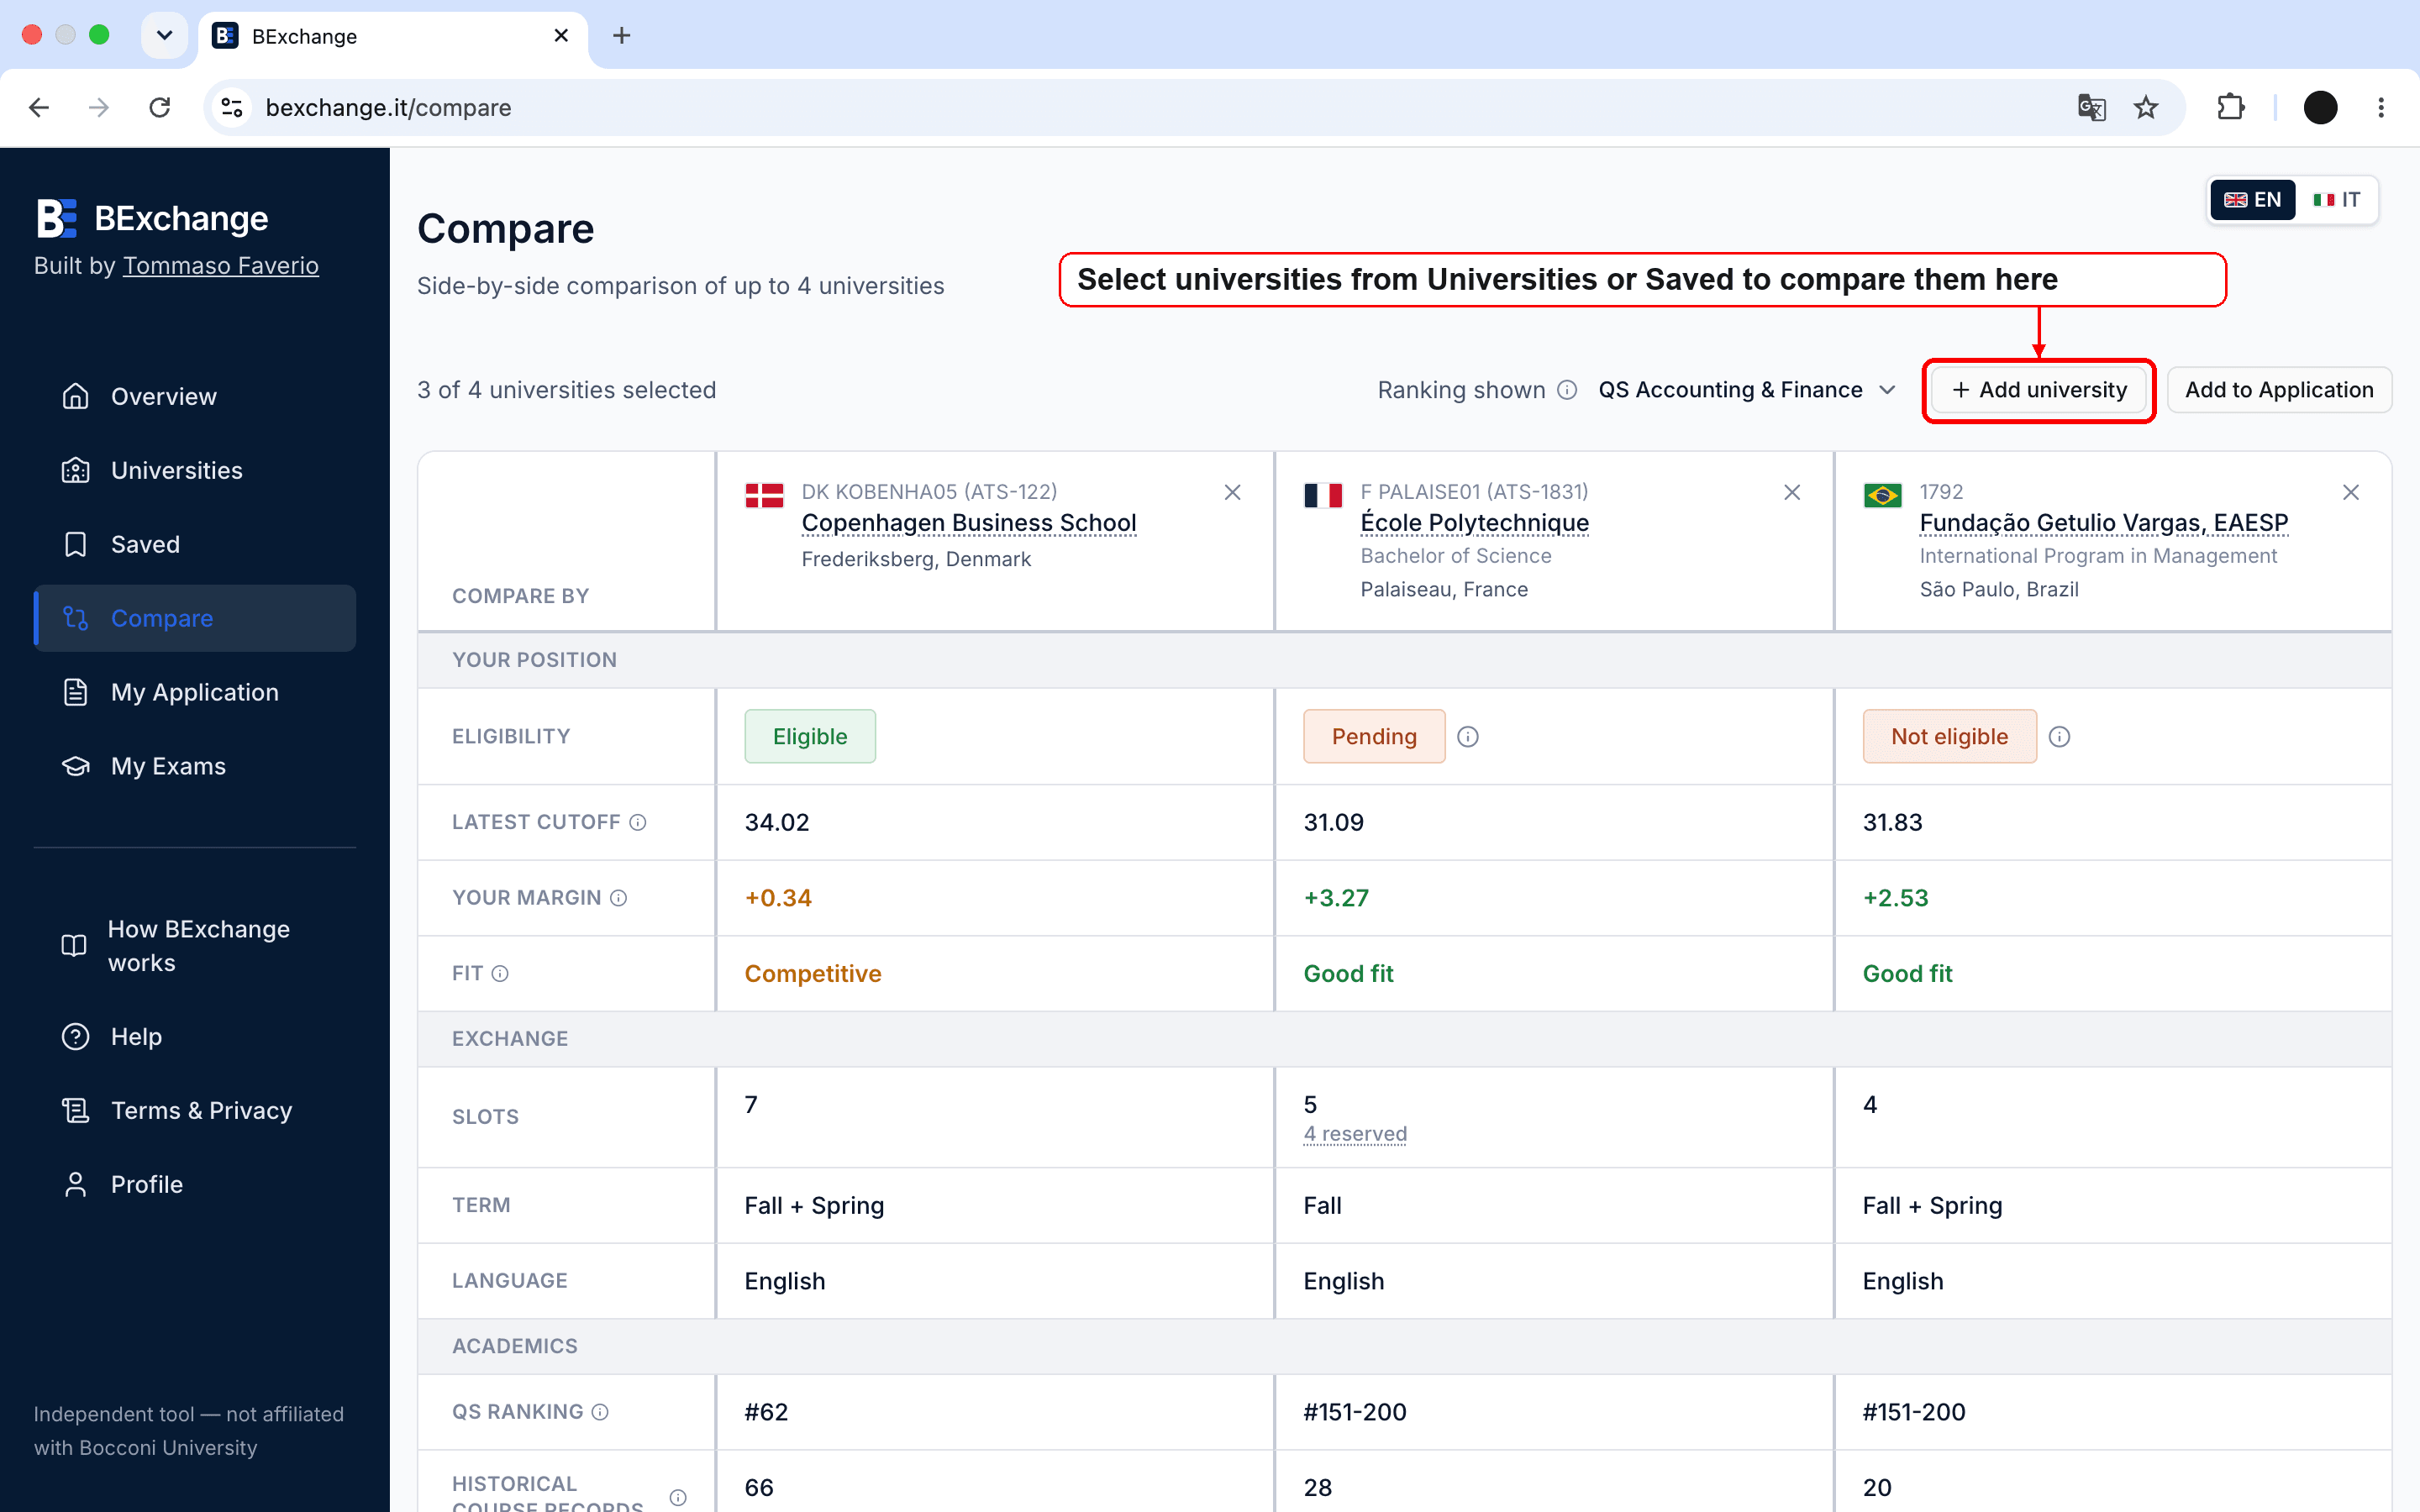
Compare universities side by side
Select multiple universities from Universities or Saved and compare them in one table.
5
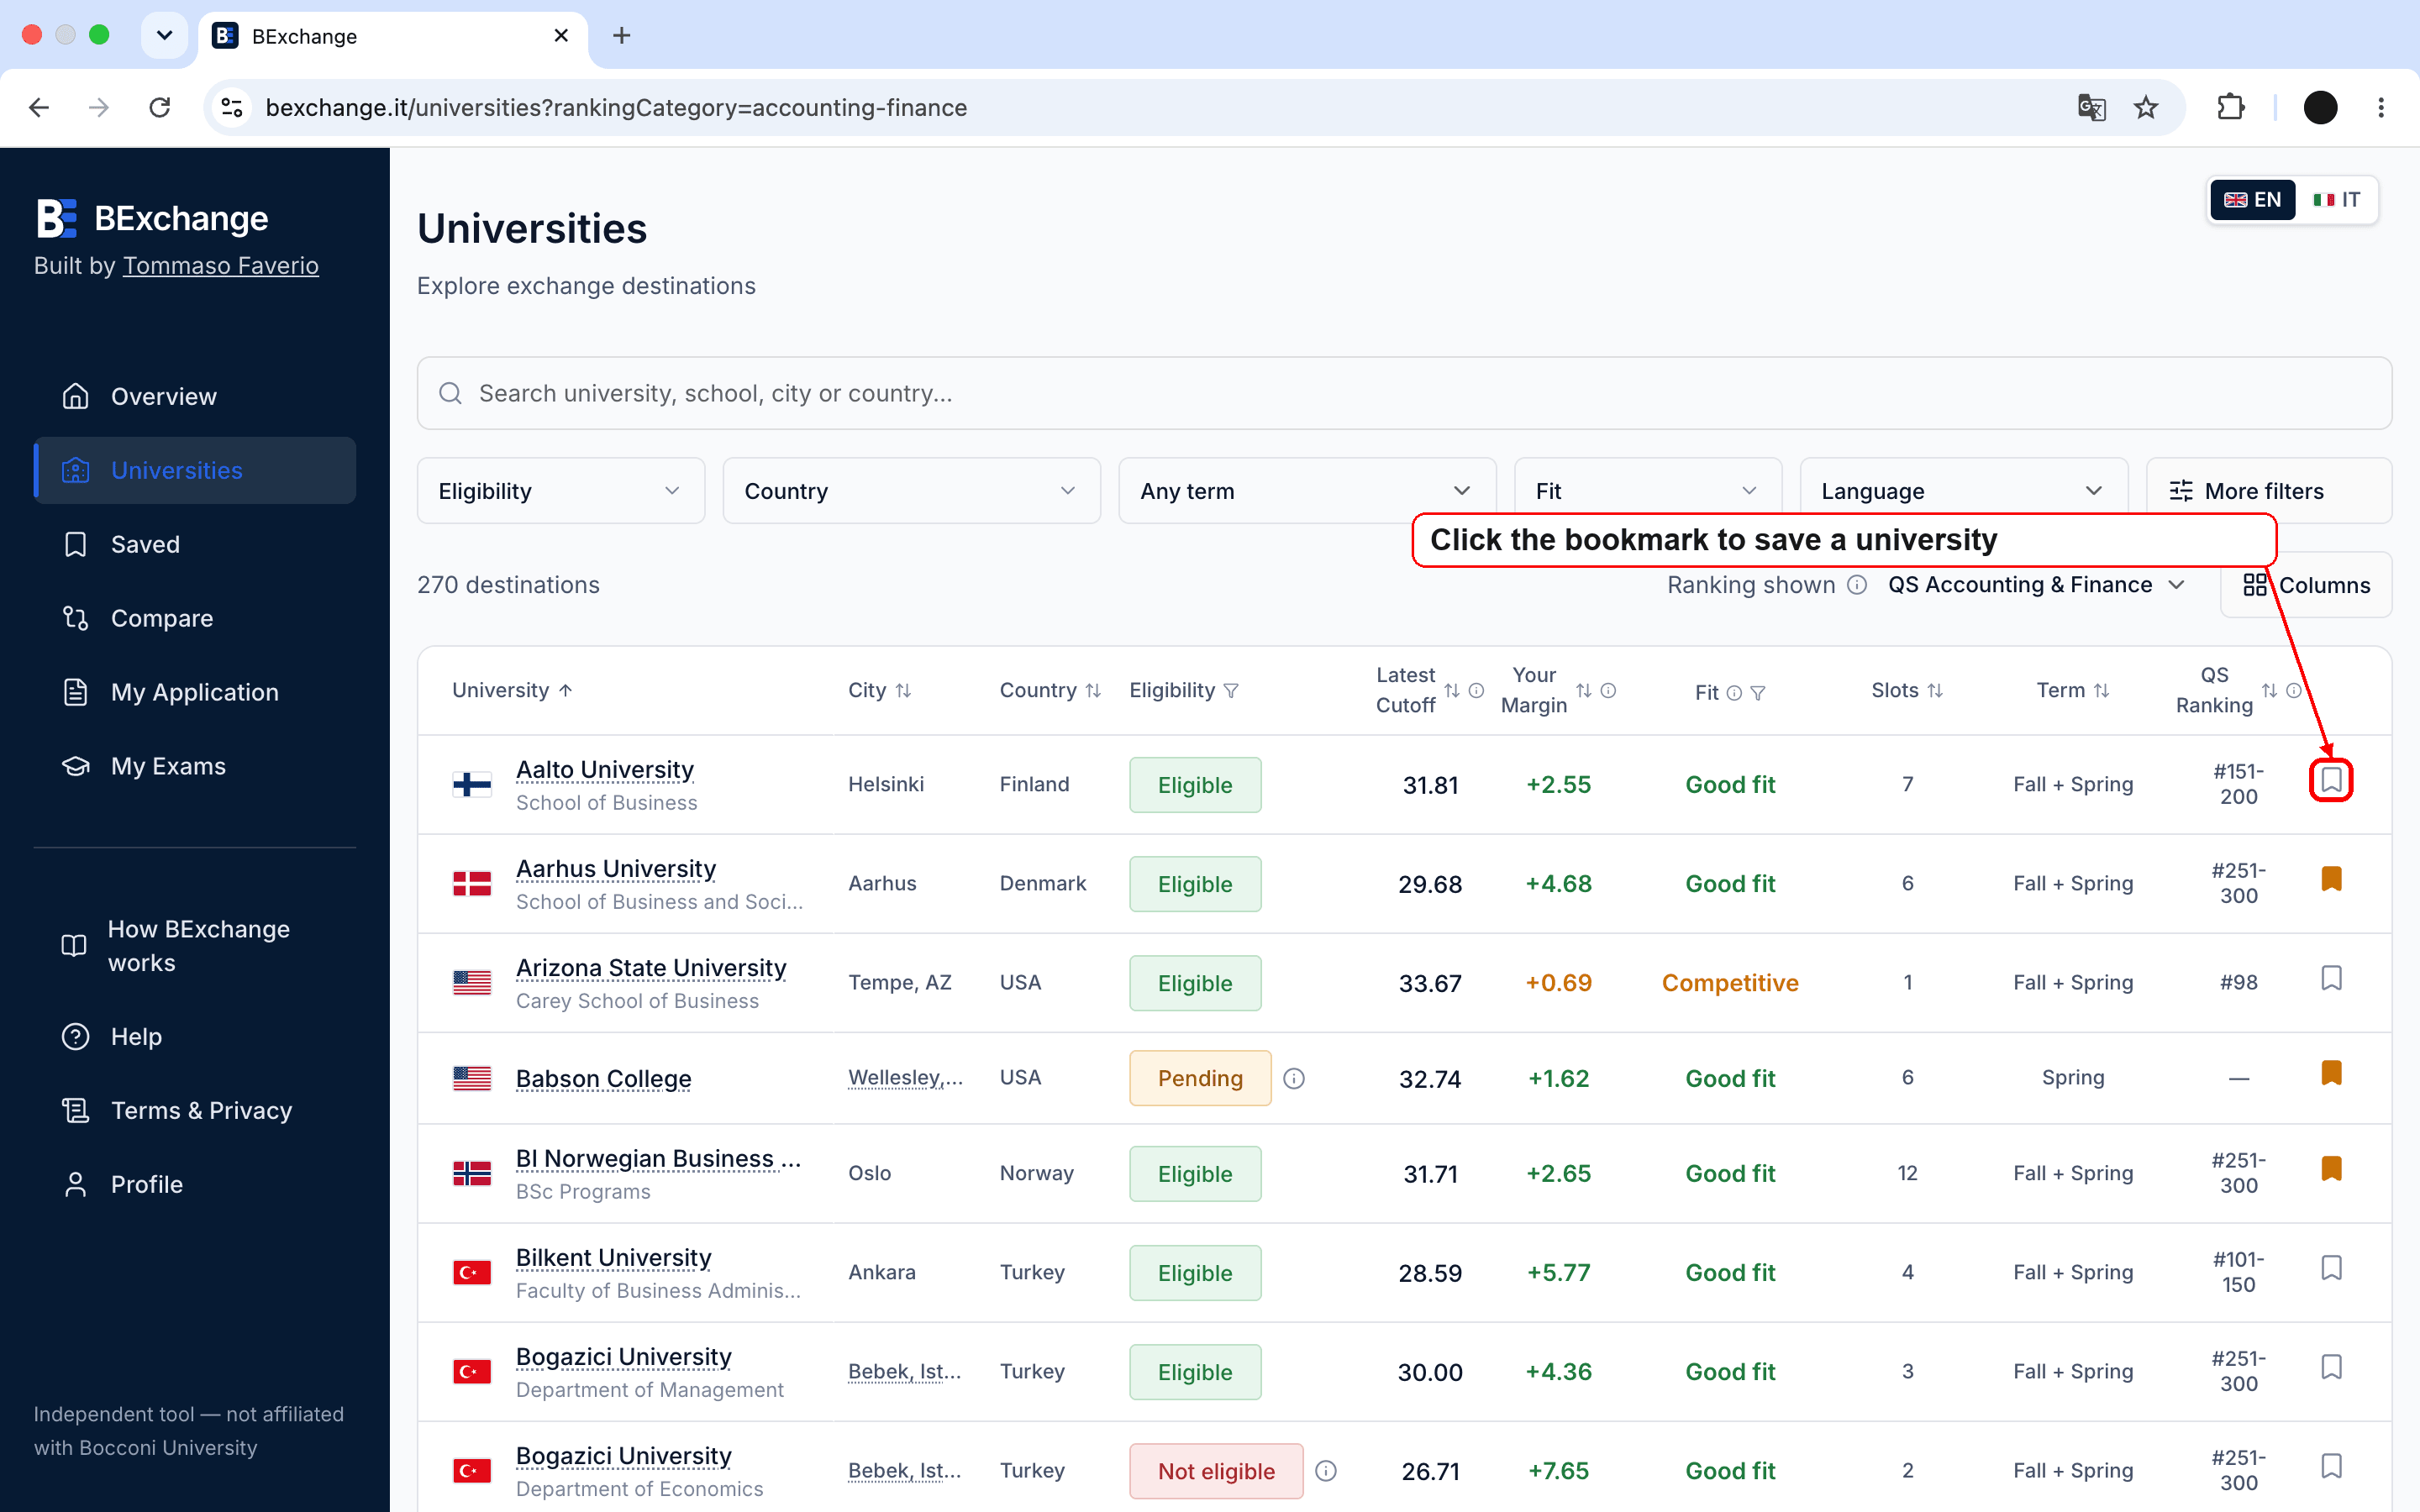
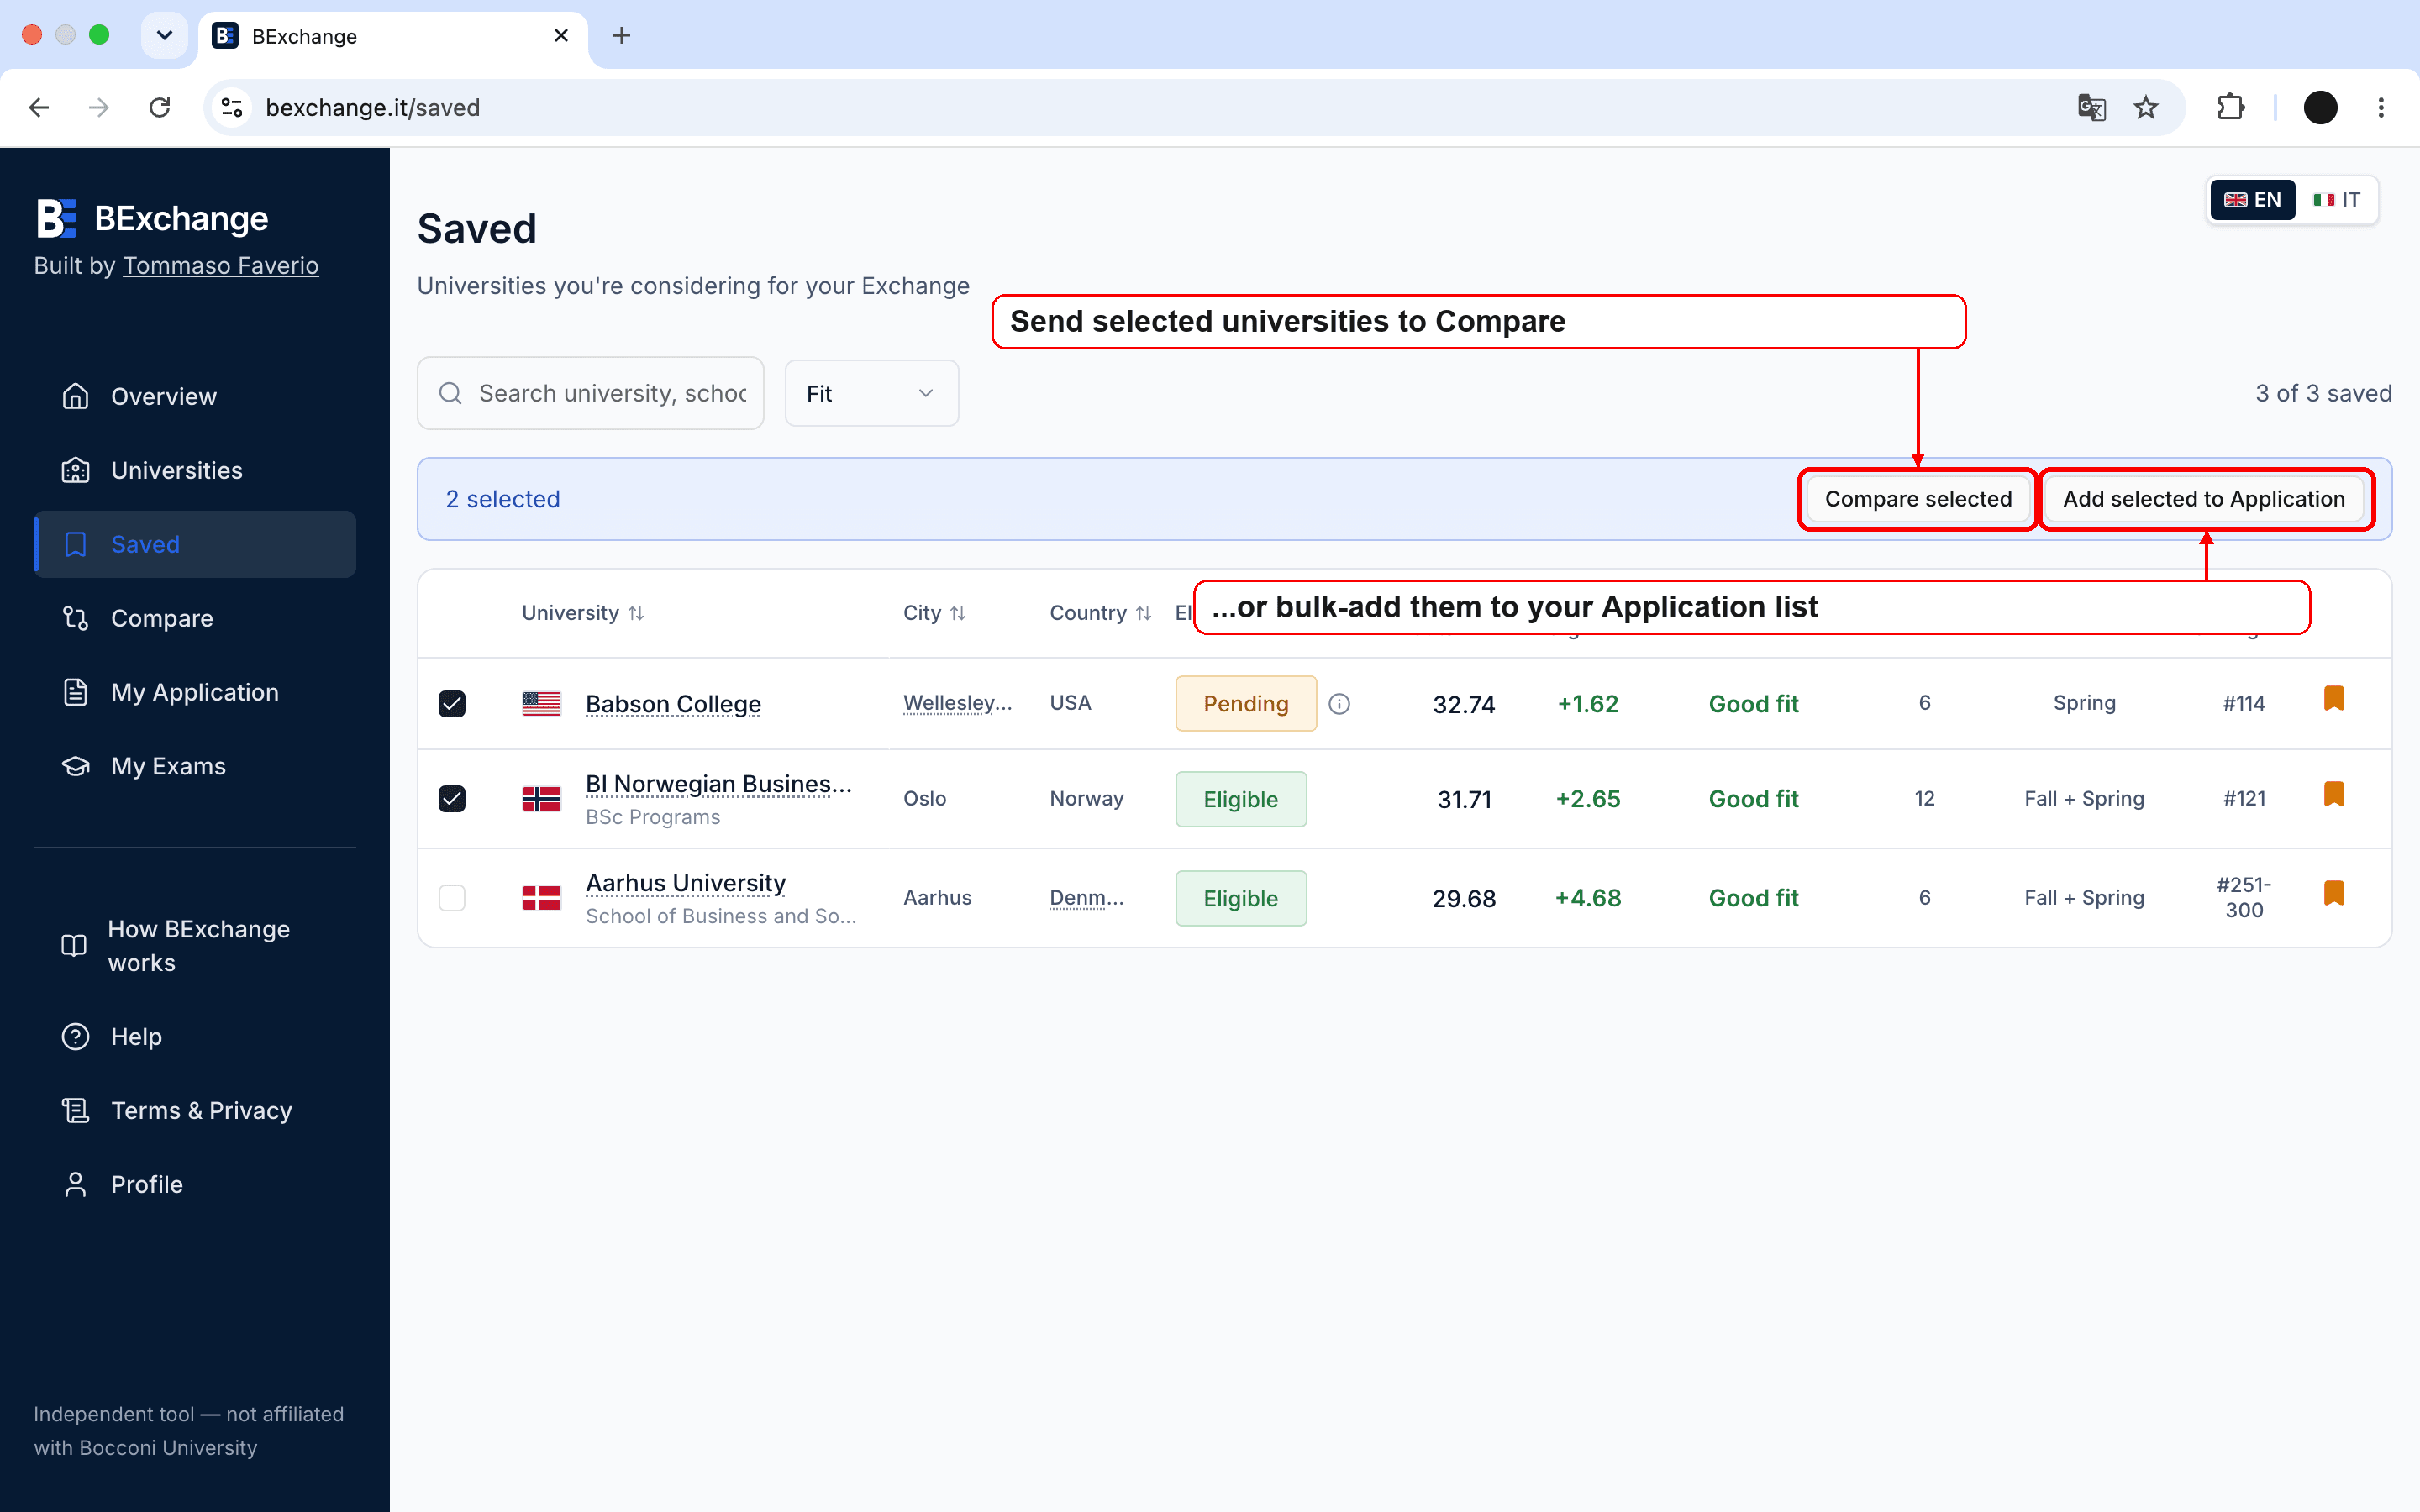
Save the universities you're interested in
Use the bookmark to save them, then send them from Saved to Compare or your Application list in bulk.
6
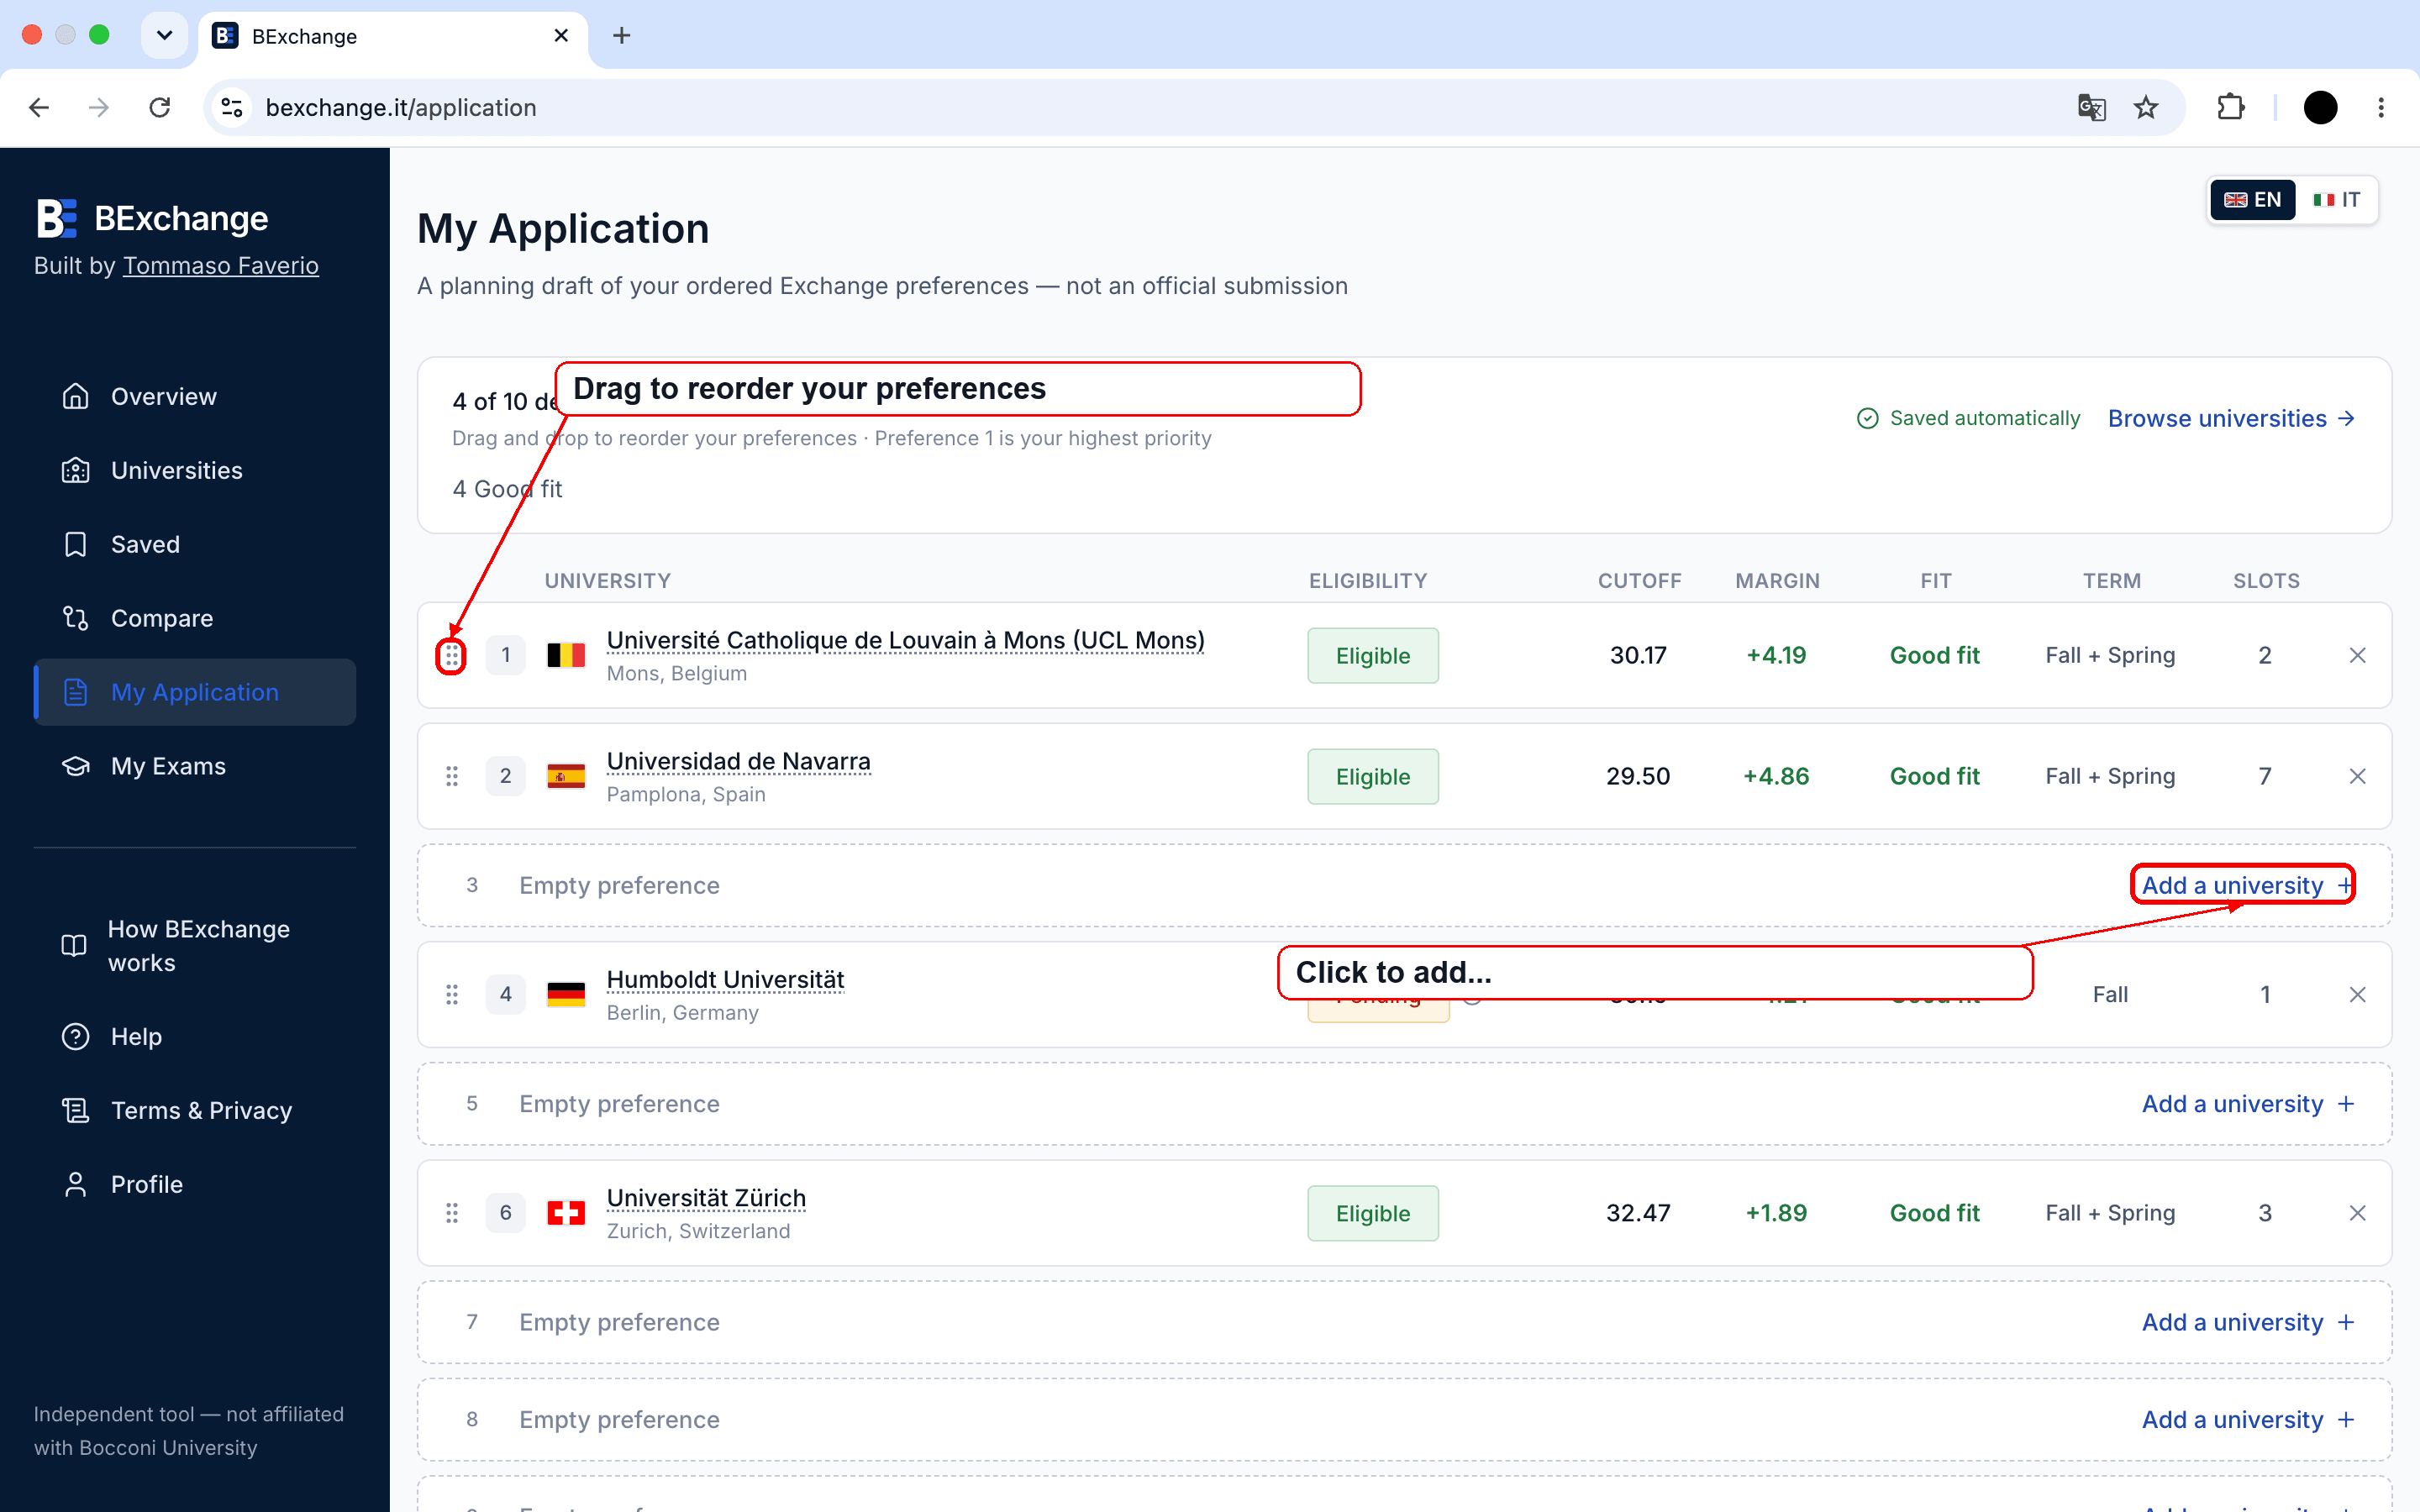
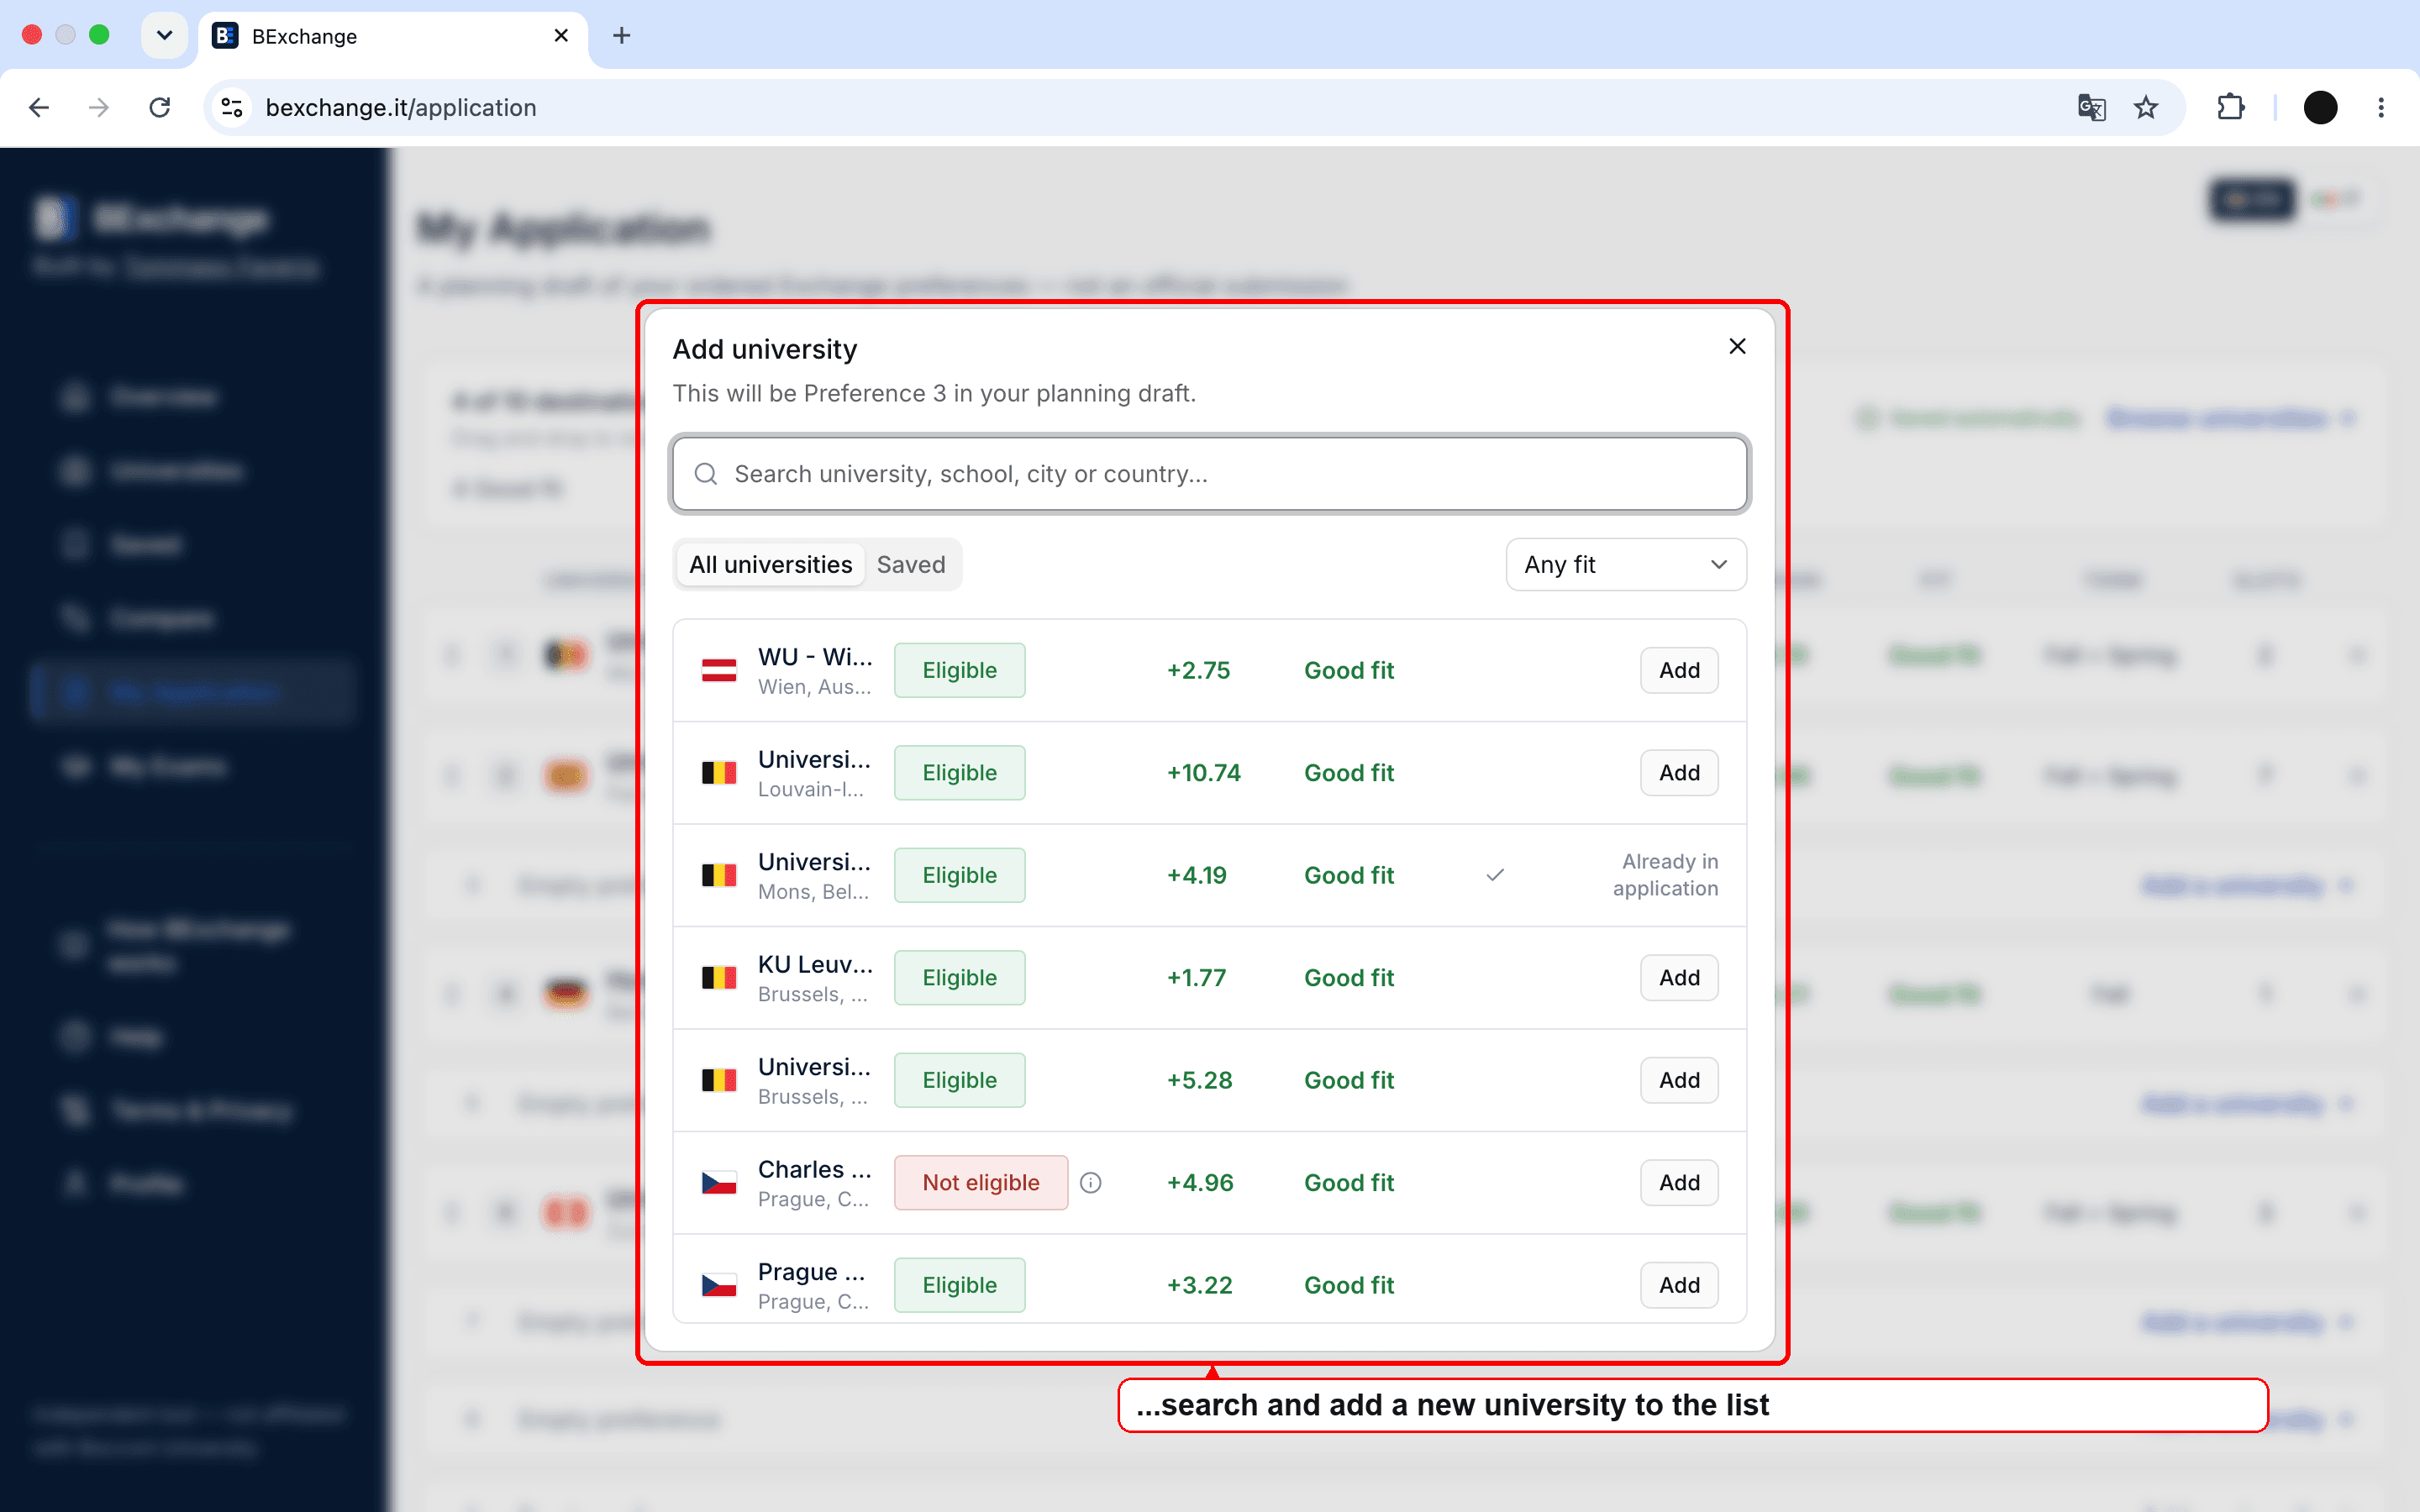
Build your ranked preference list
Add universities and reorder your preferences.